Discover the joy of crafting a personalized outdoor haven! Explore readily available wooden garden bench plans PDF, offering diverse designs for every skill level and aesthetic preference.
Why Choose a Wooden Garden Bench?
Wooden garden benches seamlessly blend functionality with natural beauty, enhancing any outdoor space. Unlike metal or plastic, wood offers a warmth and inviting aesthetic, complementing gardens and patios beautifully. DIY plans PDF empower you to customize dimensions, style, and wood type – cedar, redwood, or pressure-treated pine – to perfectly match your vision.
Furthermore, a wooden bench provides a durable and comfortable seating option for relaxation and enjoying the outdoors. Building your own bench is a rewarding experience, fostering creativity and providing a unique, personalized touch to your landscape. It’s an investment in both your comfort and the aesthetic appeal of your garden.
Benefits of DIY Garden Bench Construction
Embarking on a DIY garden bench project, guided by readily available wooden garden bench plans PDF, unlocks a wealth of advantages. Cost savings are significant, as building yourself bypasses retail markups. You gain complete control over material quality, selecting durable woods like cedar or redwood for longevity.
Moreover, DIY construction fosters a sense of accomplishment and allows for personalized design choices – adjusting size, style, and features to perfectly suit your needs. It’s a fantastic opportunity to learn new woodworking skills and create a unique piece of outdoor furniture reflecting your individual taste and craftsmanship. The result is a truly bespoke garden addition!
Essential Tools and Materials
Successful bench building, using wooden garden bench plans PDF, requires fundamental tools: saws, drills, and sanders. Quality wood, screws, bolts, and waterproof glue are also crucial.

Wood Selection: Cedar, Redwood, and Pressure-Treated Pine
Choosing the right wood is paramount when utilizing wooden garden bench plans PDF. Cedar offers natural resistance to rot and insects, making it a durable, beautiful option, though often pricier. Redwood shares similar qualities, boasting a rich color and longevity. For a more budget-friendly choice, pressure-treated pine is excellent; however, ensure it’s specifically rated for ground contact if the bench legs will directly touch the earth.
Consider the climate; cedar and redwood thrive in wetter environments. Always check for sustainably sourced wood to support responsible forestry practices. The selected wood’s thickness will also be dictated by your chosen plan, impacting the bench’s overall strength and stability. Proper wood selection ensures a lasting, enjoyable garden seating experience.
Fasteners: Screws, Bolts, and Waterproof Glue
Successfully implementing wooden garden bench plans PDF relies heavily on robust fasteners. Stainless steel or coated deck screws are ideal for most bench construction, resisting rust and corrosion. Bolts provide superior strength for critical joints, like leg attachments, especially in larger designs. However, screws are generally sufficient for seat slat attachment.
Crucially, always pair mechanical fasteners with waterproof wood glue. This creates a significantly stronger, more durable bond, preventing movement and squeaks over time. Exterior-grade glue is essential to withstand weather exposure. Pre-drilling holes prevents wood splitting, ensuring a clean and secure assembly. Don’t skimp on fastener quality – it’s a foundational element of a lasting bench!
Tools Required: Saw, Drill, Sander, and Measuring Tools
Embarking on projects utilizing wooden garden bench plans PDF necessitates a well-equipped workshop. A circular saw or hand saw is fundamental for accurate wood cutting, while a power drill—with various bit sizes—handles screw piloting and bolt hole creation. A sander, whether orbital or sanding block, ensures smooth surfaces and comfortable seating.
Precision demands accurate measuring tools: a tape measure, combination square, and level are indispensable. Clamps are vital for holding pieces securely during glue-up. Safety gear—eye protection and earplugs—is non-negotiable. Consider a countersink bit for clean screw recesses. Having the right tools streamlines construction and elevates the final product’s quality.
Finding the Right PDF Plan
Locate ideal wooden garden bench plans PDF online through various sources! Assess plan details carefully, considering your skill level and desired bench style for success.
Where to Source Free Wooden Garden Bench Plans PDF
Numerous online platforms offer free wooden garden bench plans PDF downloads. Websites dedicated to DIY projects, woodworking enthusiasts, and home improvement frequently host these resources. A quick internet search using keywords like “free garden bench plans PDF” will yield a substantial list of options.
Popular sites include woodworking project websites, online forums focused on DIY construction, and even some furniture retailer websites offering plans as promotional material. Remember to carefully vet the source to ensure the plan is complete, accurate, and easy to follow. Always prioritize plans with clear diagrams, detailed instructions, and a comprehensive materials list to streamline your building process and avoid potential frustrations.
Evaluating Plan Complexity: Beginner, Intermediate, Advanced
Assessing the complexity of wooden garden bench plans PDF is crucial for a successful build. Beginner plans typically involve simple designs with straight cuts and basic joinery, like butt joints secured with screws. Intermediate plans introduce more challenging cuts, potentially including angles, and may feature stronger joinery methods like lap joints.
Advanced plans often incorporate curved elements, intricate details, and complex joinery techniques such as mortise and tenon. Consider your skill level honestly; starting with a simpler plan builds confidence. Look for plans clearly labeled with a difficulty rating, and review the tool list – a long list of specialized tools suggests a higher complexity level.
Key Elements of a Good Garden Bench Plan
Effective wooden garden bench plans PDF should include detailed, dimensioned drawings, clearly illustrating each component and assembly step. A comprehensive materials list, specifying wood type, quantity, and size, is essential for accurate purchasing. Look for plans with cut lists, optimizing wood usage and minimizing waste.
Good plans also detail joinery methods – screws, bolts, or glue – with clear instructions. Safety precautions should be highlighted. A well-written plan anticipates potential challenges and offers solutions. Bonus features like finishing suggestions or variations add value. Prioritize plans with positive user reviews and clear, concise language.

Basic Garden Bench Designs
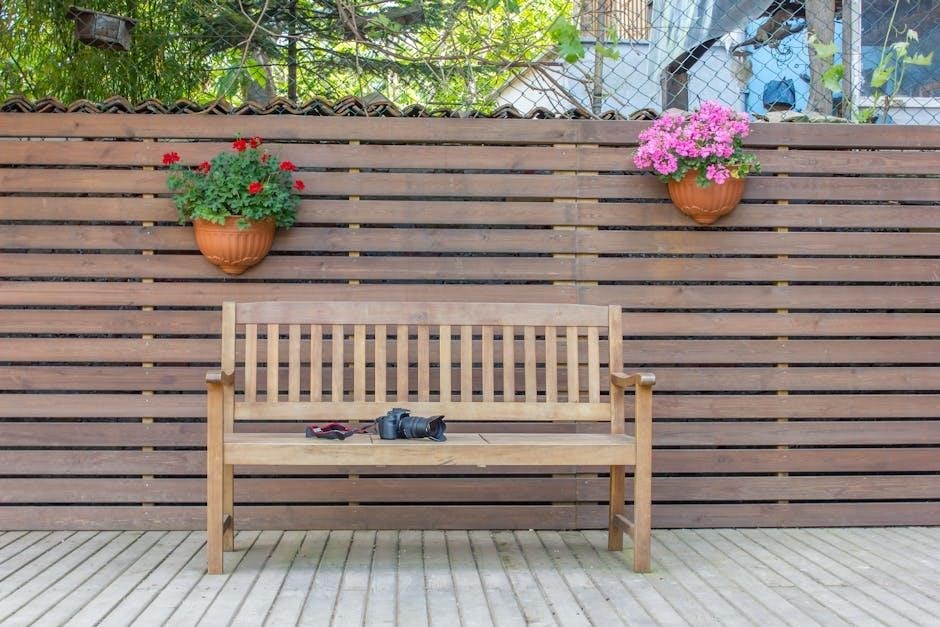
Explore classic options like simple slatted benches, those with supportive backrests, and designs featuring comfortable armrests – all easily found in wooden garden bench plans PDF.
Simple Slatted Bench Plan
For beginners, a simple slatted bench represents an excellent starting point. These plans, frequently available as wooden garden bench plans PDF downloads, typically involve straightforward cuts and assembly. The design centers around a sturdy frame supporting evenly spaced wooden slats that form the seating surface.
Construction generally requires minimal joinery skills, often relying on screws and waterproof glue for secure connections. Many free plans provide detailed diagrams and cutting lists, simplifying the process. This style is incredibly versatile, easily customized with different wood types – cedar and pressure-treated pine are popular choices – and finishes to match your garden’s aesthetic. Expect a project completion time of around 3-4 hours, making it a rewarding weekend endeavor.
Backrest Bench Plan
Elevate your garden relaxation with a backrest bench! Numerous wooden garden bench plans PDF showcase designs incorporating a supportive back, offering enhanced comfort. These plans range in complexity, from simple vertical slat backrests to more elaborate curved or lattice designs.
Construction typically involves building a robust frame to support both the seat and back, requiring slightly more advanced joinery techniques like mortise and tenon or sturdy screw connections. Detailed plans will guide you through angle cuts for the backrest and ensure proper support. Consider cedar for its weather resistance or pressure-treated pine for affordability. Allow approximately 6-8 hours for completion, depending on the design’s intricacy.
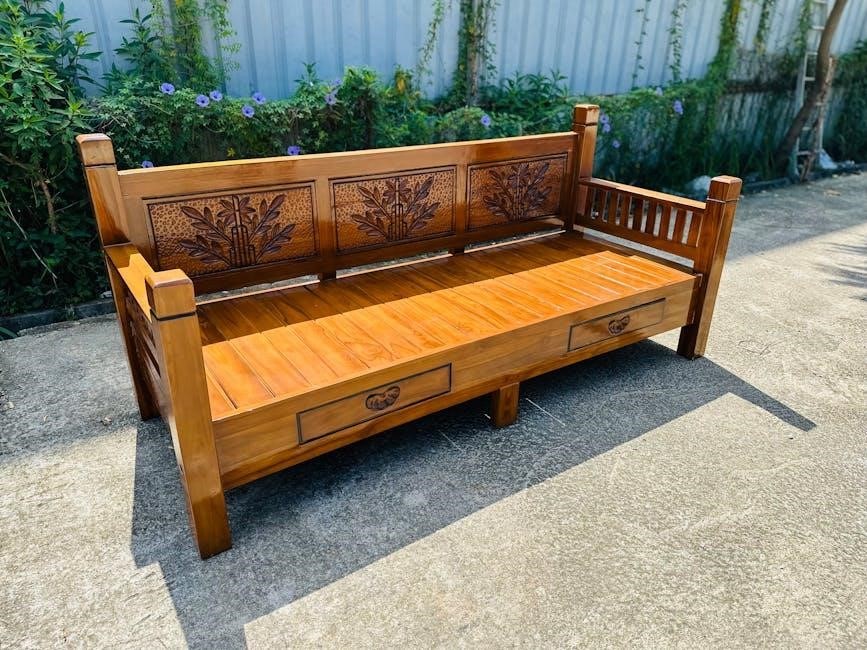
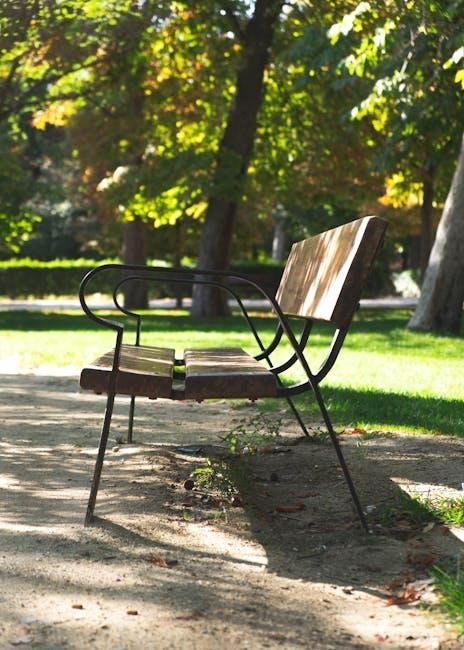
Armrest Bench Plan
Enhance your garden seating with the classic comfort of armrests! Many wooden garden bench plans PDF feature designs incorporating arms, providing a refined and inviting aesthetic; These plans vary from simple, straight armrests to more sculpted or curved options, adding a touch of elegance.
Building an armrest bench requires careful attention to detail, ensuring the arms are securely attached to the frame and provide adequate support. Detailed plans will specify the necessary angles and joinery techniques. Cedar or redwood are excellent wood choices for durability. Expect a build time of 8-10 hours, depending on the complexity of the armrest design and overall bench structure.
Construction Steps: A General Guide
Follow your chosen wooden garden bench plans PDF closely! Typically, construction involves cutting wood, assembling the frame, and securely attaching seat slats for lasting comfort.
Cutting the Wood According to the Plan
Precise wood cutting is paramount when utilizing wooden garden bench plans PDF. Carefully review the dimensions specified within your chosen plan before making any cuts. Employ a sharp saw – whether hand saw or power saw – to ensure clean, accurate lines. Double-check measurements against the plan repeatedly throughout the process, minimizing errors. Consider using a speed square or combination square for marking straight lines. Remember that accurate cuts contribute significantly to the bench’s structural integrity and overall aesthetic appeal. Prioritize safety by wearing appropriate eye and ear protection during cutting operations. Label each piece as you cut it, referencing the plan’s parts list for easy assembly later.
Assembling the Frame and Legs
Begin assembling the garden bench frame and legs, referencing your wooden garden bench plans PDF for guidance. Utilize waterproof glue in conjunction with screws or bolts for a robust and weather-resistant connection. Ensure squareness during assembly; a framing square is invaluable here. Pre-drill pilot holes to prevent wood splitting, especially when working with hardwoods. Clamp pieces together securely while the glue dries, maintaining alignment. Pay close attention to the plan’s joinery details – mortise and tenon, or simple butt joints – and execute them accurately. Regularly check for squareness as you progress, adjusting as needed.
Attaching the Seat Slats
Proceed with attaching the seat slats to the assembled frame, consulting your wooden garden bench plans PDF for precise spacing. Employ screws, ensuring they are countersunk to prevent snagging. Maintain consistent gaps between slats for both aesthetics and water drainage. Consider using a spacer block to achieve uniform spacing quickly and efficiently. Pre-drilling pilot holes is crucial to avoid splitting the slats. Apply a bead of waterproof glue along the frame before securing each slat for added strength. Regularly check alignment to ensure a level and comfortable seating surface.

Finishing and Protecting Your Bench
Enhance your bench’s beauty and longevity! Apply sanding, wood preservatives, sealants, paint, or stain, referencing your wooden garden bench plans PDF for guidance.
Sanding and Smoothing the Wood
Achieving a flawlessly smooth surface is paramount for both aesthetics and comfort. Begin with a coarser grit sandpaper – typically 80 or 100 – to remove any significant imperfections, rough edges, or mill marks present on the wood, as indicated in your wooden garden bench plans PDF.
Progress gradually to medium-grit sandpaper (120-150) to refine the surface, followed by a fine-grit (180-220) for an exceptionally smooth finish. Always sand with the grain of the wood to avoid unsightly scratches.
Dust removal between grits is crucial; a tack cloth works wonders. Thorough sanding prepares the wood optimally for accepting finishes, ensuring better adhesion and a professional-looking result, aligning with the project’s detailed instructions.
Applying Wood Preservatives and Sealants
Protecting your newly built bench from the elements is vital for longevity. Refer to your wooden garden bench plans PDF for recommended treatments, but generally, a wood preservative is the first step. This combats rot, decay, and insect infestation, especially crucial for outdoor furniture.
Follow with a sealant – options include spar urethane or exterior-grade varnish – to create a water-resistant barrier. Apply several thin coats, allowing each to dry completely and lightly sanding between applications for optimal adhesion.
Ensure complete coverage, paying attention to joints and end grains. Proper preservation and sealing significantly extend the bench’s lifespan, maintaining its beauty for years to come.
Painting or Staining for Aesthetic Appeal
Enhance the visual charm of your bench with paint or stain, referencing color schemes suggested in your wooden garden bench plans PDF, if available. Staining allows the wood grain to show through, offering a natural look, while paint provides full coverage and a wider color palette.
Prioritize exterior-grade products designed to withstand weather conditions. Apply in thin, even coats, following the manufacturer’s instructions. Consider a primer before painting for better adhesion and durability.
Remember to allow each coat to dry thoroughly before applying the next, and lightly sand between coats for a smoother finish. This final touch personalizes your creation!
Maintenance and Care
Ensure longevity by routinely cleaning and inspecting your bench, referencing your wooden garden bench plans PDF for wood type specifics and protective treatment recommendations.
Regular Cleaning and Inspection
Consistent upkeep is vital for preserving your beautiful, handcrafted garden bench. Refer to your wooden garden bench plans PDF to understand the specific wood used, as cleaning methods vary. Generally, a mild soap and water solution applied with a soft brush is sufficient for removing dirt and debris. Inspect the bench at least twice yearly – spring and fall – for any signs of damage.
Pay close attention to joints, looking for looseness or separation. Check for cracks, splinters, or signs of rot, especially in areas exposed to moisture. Examine the finish for wear and tear, and address any peeling or fading promptly. Early detection of issues, guided by your plan’s details, prevents minor problems from escalating into costly repairs, ensuring years of enjoyment.
Repairing Minor Damage
Addressing small issues promptly extends your bench’s lifespan. Consult your wooden garden bench plans PDF for wood type and joinery details. For loose screws, simply tighten them – consider replacing them with stainless steel for enhanced durability. Minor cracks can often be filled with exterior wood filler, sanded smooth, and then resealed. Splinters should be carefully removed and the area sanded.
If the finish is chipped, lightly sand the affected area, apply a wood preservative, and then reapply the stain or paint, matching the original color as closely as possible. Remember to always prepare the surface properly before applying any finish. Following your plan’s guidance ensures repairs blend seamlessly and maintain the bench’s structural integrity.
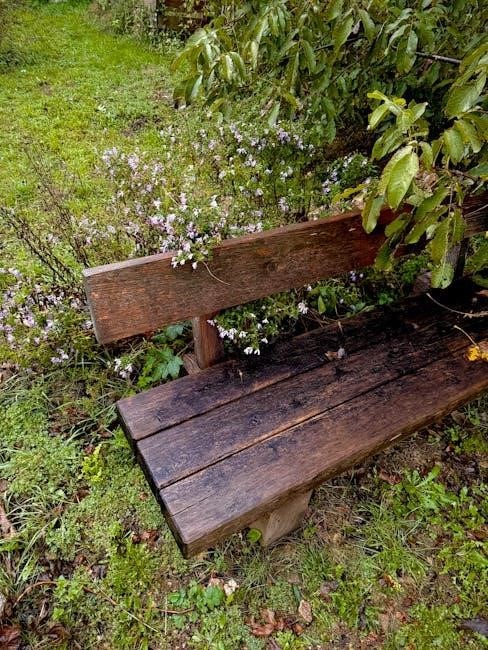
Protecting from the Elements
Shielding your bench from weather is crucial for longevity. Refer to your wooden garden bench plans PDF for wood type, as this impacts protection needs. Consider a waterproof cover during harsh winters or prolonged rainy seasons. Elevating the bench slightly off the ground prevents moisture absorption and rot. Regular application of wood preservative and sealant, as outlined in finishing steps, creates a protective barrier.
Positioning the bench in a sheltered location, away from direct sunlight and strong winds, minimizes damage. Periodic inspection for signs of weathering, like cracking or fading, allows for timely intervention and maintains the bench’s beauty and structural soundness.

Advanced Design Considerations
Elevate your project beyond basic wooden garden bench plans PDF! Incorporate curves, storage, or matching tables for a truly customized and functional outdoor space.
Incorporating Curves and Decorative Elements
Beyond straightforward designs found in standard wooden garden bench plans PDF, consider adding visual interest through curved elements. Gently arched backrests or subtly rounded legs soften the bench’s appearance, creating a more inviting aesthetic. Decorative touches, like carved details or inlaid patterns, elevate the craftsmanship.
Explore scrollwork designs or utilize contrasting wood species to highlight specific features. Remember that incorporating curves often requires more advanced woodworking skills and potentially modified plans. Carefully assess your abilities and the complexity of the design before committing. Utilizing templates and precise cutting techniques are crucial for achieving smooth, flowing curves. These additions transform a functional bench into a stunning focal point within your garden.
Adding Storage or Planter Boxes
Enhance the functionality of your wooden garden bench plans PDF project by integrating storage or planter boxes. A hollow base can become concealed storage for gardening tools, cushions, or outdoor games, maximizing space efficiency. Alternatively, incorporate built-in planter boxes along the sides or beneath the seat.
Consider waterproofing the interior of these additions to protect the wood and prevent soil leakage. Modifying existing plans requires careful measurement and structural adjustments to maintain stability. Ensure adequate drainage for planter boxes to prevent root rot. This dual-purpose design blends seating with practical gardening solutions, creating a beautiful and useful addition to any outdoor space.
Building a Matching Table or Set
Elevate your outdoor living space by extending your wooden garden bench plans PDF project to include a matching table or complete furniture set. Utilizing the same wood type and finish ensures a cohesive aesthetic. Simple side tables can complement the bench, providing a surface for drinks or books.
For a more ambitious undertaking, design a dining table with similar design elements. Consider scaling the plans proportionally to maintain visual harmony. Building a set allows for coordinated outdoor entertaining and relaxation. Consistent joinery techniques and wood preservation methods will guarantee durability and longevity for the entire ensemble.