T6 Pro Installation Manual: A Comprehensive Guide
Congratulations on your purchase! This manual details the Honeywell T6 Pro‚ offering a roadmap for successful operation and installation‚ ensuring optimal performance․
Welcome to smart home climate control! The Honeywell T6 Pro is a digital‚ programmable thermostat designed to provide efficient and convenient temperature management within your home․ Unlike basic thermostats‚ the T6 Pro offers advanced scheduling capabilities‚ allowing you to customize heating and cooling cycles to match your lifestyle and optimize energy savings․
This thermostat doesn’t qualify as a “smart” thermostat in the fully connected sense‚ but it delivers robust functionality․ It features a memory function to retain your settings‚ even during power outages․ The included manual‚ available in PDF format‚ provides detailed instructions for installation and operation․ Its user-friendly interface and programmable settings make it a valuable addition to any home seeking enhanced comfort and control․
Unboxing and Component Check
Carefully unpack your Honeywell T6 Pro thermostat package․ Ensure all components are present before proceeding with installation․ You should find the T6 Pro thermostat unit itself‚ mounting hardware (including screws and wall anchors)‚ and a detailed installation manual – available as a PDF download․ Two types of mounting brackets are included‚ offering flexibility during installation․
Inspect each item for any signs of damage incurred during shipping․ Verify the thermostat’s physical characteristics align with specifications: a weight of 35․5 grams․ Retain the packaging and all documentation for potential warranty claims or future reference․ A missing component or damaged part should be reported to the retailer immediately․
Safety Precautions
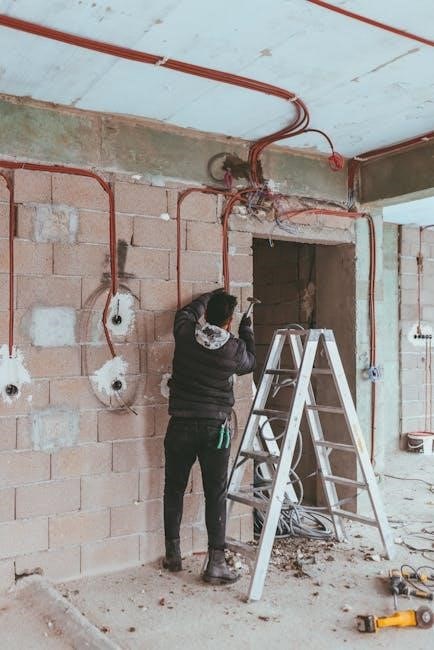
Prioritize safety during T6 Pro installation! Always disconnect power to your heating and cooling system at the breaker box before commencing any wiring work․ Incorrect wiring can lead to electrical shock or damage to the thermostat and HVAC equipment․ If you are uncomfortable working with electrical wiring‚ consult a qualified HVAC technician․
The T6 Pro boasts an IPX4-rated water-resistant casing‚ offering some protection against moisture․ However‚ avoid direct exposure to excessive water or harsh cleaning agents․ Ensure the installation location is dry and protected from the elements․ Follow all local electrical codes and regulations during installation; Improper installation voids the warranty․
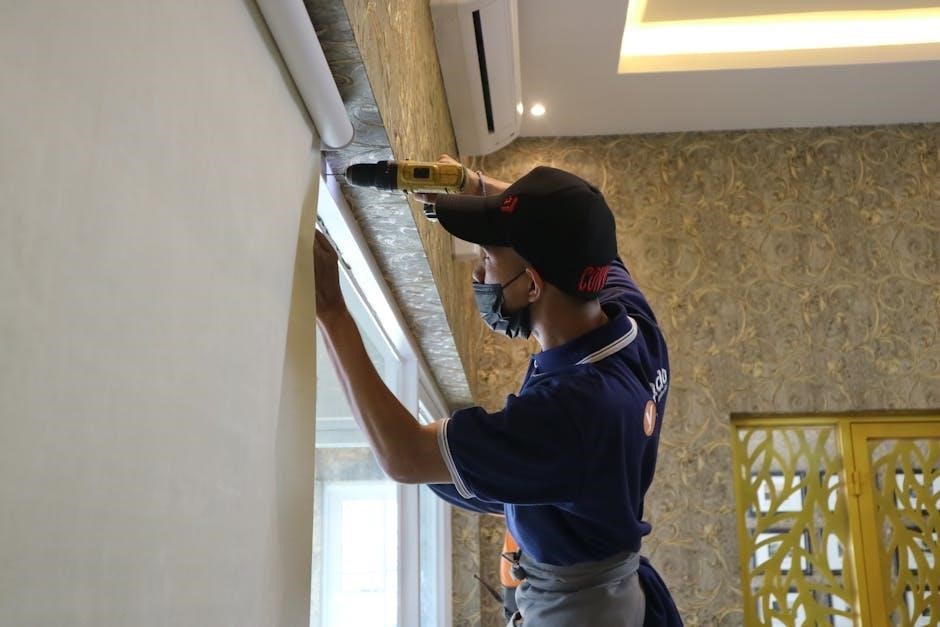
Installation Process
Begin the installation! This phase covers wiring‚ powering on the T6 Pro‚ and securely mounting the thermostat for optimal functionality and long-term use․
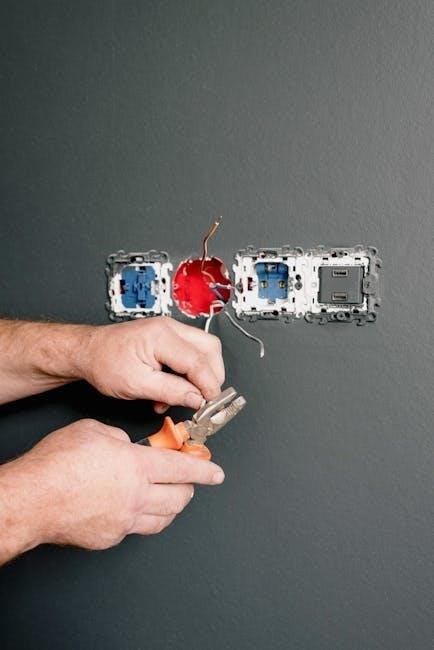
Wiring Diagram Overview

Understanding the wiring is crucial for a successful installation․ The Honeywell T6 Pro utilizes standard thermostat wiring‚ typically involving connections for power (Rh/Rc)‚ heating (W)‚ cooling (Y)‚ and common (C)․ Always disconnect power at the breaker before commencing any wiring work․
Refer to the detailed wiring diagram included in this manual – and the PDF version available online – to correctly identify each wire․ Incorrect wiring can damage the thermostat or your HVAC system․ Pay close attention to jumper settings if your system doesn’t utilize all standard wires;
Ensure wires are securely connected to the terminal blocks‚ avoiding loose connections․ Double-check all connections against the diagram before restoring power․ A properly wired thermostat is the foundation for reliable operation․
Powering On the T6 Pro
After verifying the wiring‚ restore power at the breaker․ The T6 Pro should automatically power on and display the welcome screen․ If it doesn’t‚ re-check all wiring connections‚ ensuring the ‘C’ wire (common wire) is securely connected – this is often a source of initial power-up issues․
Observe the display for any error messages․ If errors appear‚ consult the troubleshooting section of this manual․ The initial boot-up process may take a few moments as the thermostat initializes․
Once powered on‚ the thermostat will likely prompt you to begin the setup process‚ including connecting to Wi-Fi and setting the date and time․ Follow the on-screen instructions carefully․
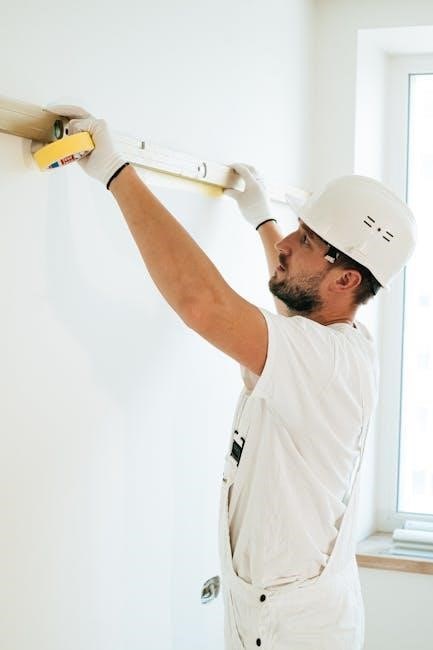
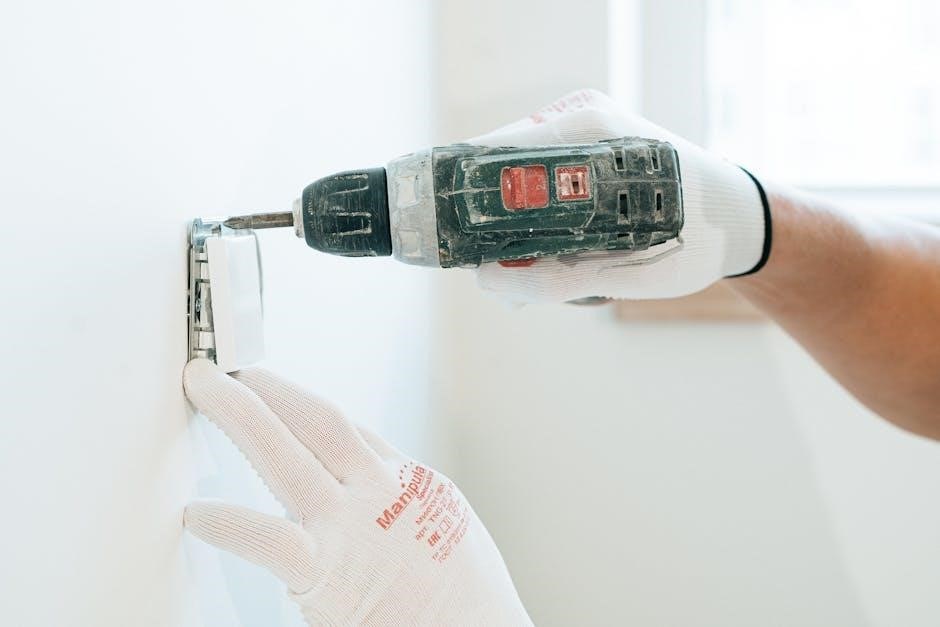
Mounting the Thermostat
With the wiring completed and verified‚ carefully mount the T6 Pro to the wall plate․ The unit typically snaps into place‚ ensuring a secure fit․ Use the provided screws to firmly attach the wall plate to the wall‚ utilizing the existing holes if possible․ Ensure the thermostat is level for optimal display visibility․
The T6 Pro includes two types of mounting hardware for versatile installation․ Double-check that the thermostat is securely fastened and doesn’t wobble․ A loose mount can cause connection issues or damage the internal components․
Finally‚ confirm that all wires are neatly tucked into the wall cavity‚ avoiding any strain on the connections․

Configuration and Setup
Now powered on‚ the T6 Pro requires initial setup․ This includes connecting to your Wi-Fi network and accurately setting the current date and time․
Connecting to Wi-Fi
Establishing a Wi-Fi connection unlocks the T6 Pro’s smart features․ From the thermostat’s display interface‚ navigate to the network settings menu․ A list of available wireless networks will appear; select your home network from this list; You will then be prompted to enter your Wi-Fi password using the on-screen keyboard․
Ensure the password is entered correctly‚ as incorrect credentials will prevent connection․ Once the password is submitted‚ the thermostat will attempt to connect to the network․ A successful connection is typically indicated by a Wi-Fi symbol appearing on the display․ If the connection fails‚ double-check the password and ensure your router is functioning correctly․ Refer to the troubleshooting section for further assistance with connectivity issues․
Setting Date and Time
Accurate date and time settings are crucial for proper scheduling and operation of your T6 Pro․ Access the date and time settings through the thermostat’s main menu․ You can typically adjust these settings manually or enable automatic synchronization with a network time server once connected to Wi-Fi․
For manual adjustment‚ use the on-screen controls to set the current month‚ day‚ and year․ Similarly‚ adjust the hour and minute to reflect the correct time․ If Wi-Fi is connected‚ selecting the automatic time synchronization option will ensure your thermostat always displays the accurate time‚ eliminating the need for manual adjustments during daylight saving time or other time changes․
Programming Schedules
The T6 Pro’s programmable schedules allow for customized temperature control throughout the day‚ optimizing comfort and energy savings․ Access the scheduling function via the main menu․ You can create different schedules for weekdays and weekends‚ or customize each day individually․
Within each schedule‚ define multiple periods with specific start times and desired temperatures․ For example‚ you might set a lower temperature during sleeping hours and when the house is unoccupied‚ and a comfortable temperature for when you are home․ The thermostat will automatically adjust the temperature based on the programmed schedule‚ providing consistent comfort and reducing energy consumption․
Features and Functionality
Explore the T6 Pro’s diverse features‚ including a user-friendly display interface‚ memory function for settings retention‚ and fully programmable options for personalized comfort․
Understanding the Display Interface
The Honeywell T6 Pro boasts an intuitive display designed for ease of use and clear information presentation․ Upon powering on‚ the main screen prominently displays the current room temperature and the setpoint temperature․ Navigation is achieved through simple on-screen buttons‚ allowing users to effortlessly cycle through various modes – Heat‚ Cool‚ Auto‚ and Off․
Additional icons indicate system status‚ such as fan operation and Wi-Fi connectivity․ A dedicated menu button grants access to advanced settings‚ scheduling options‚ and system information․ The display’s brightness is automatically adjusted for optimal visibility in varying lighting conditions․ Familiarizing yourself with these elements will unlock the full potential of your T6 Pro thermostat‚ ensuring comfortable and efficient climate control․
Memory Function Details
The Honeywell T6 Pro incorporates a robust memory function‚ retaining your programmed schedules and personalized settings even during power outages․ This ensures your comfort preferences are automatically restored without requiring manual reprogramming․ The thermostat stores multiple schedules‚ accommodating diverse lifestyles and energy-saving goals․
Furthermore‚ the T6 Pro remembers your Wi-Fi credentials‚ streamlining reconnection after a disruption․ This feature minimizes inconvenience and maintains seamless remote control via the Honeywell Home app․ The internal memory safeguards against data loss‚ providing a reliable and consistent user experience․ This dependable memory function is a key benefit‚ offering peace of mind and effortless operation․
Programmable Settings Explained
The T6 Pro’s programmable settings offer extensive control over your home’s climate․ You can create customized schedules with different temperature setpoints for various times of the day and days of the week․ These schedules can be tailored to your lifestyle‚ maximizing comfort and minimizing energy consumption․
Settings include options for temporary holds‚ overriding the programmed schedule for a specified duration‚ and permanent holds‚ establishing a fixed temperature indefinitely․ Geofencing capabilities‚ when connected to Wi-Fi‚ automatically adjust the temperature based on your location․ Explore fan control settings‚ swing mode adjustments‚ and filter change reminders for a fully personalized experience․
Troubleshooting
Encountering issues? This section provides solutions for common installation problems‚ connectivity concerns‚ and deciphering error codes for a smooth setup․
Common Installation Issues
Incorrect Wiring: A frequent problem involves mismatched wiring connections․ Double-check the wiring diagram‚ ensuring each wire corresponds to the correct terminal on both the thermostat and your HVAC system․ Incorrect connections can prevent the system from powering on or functioning correctly․
Power Supply Problems: Verify the power supply to the thermostat is adequate․ A weak or interrupted power source can cause erratic behavior or a complete failure to boot․ Inspect the circuit breaker and wiring for any issues․
Mounting Instability: Ensure the thermostat is securely mounted to the wall․ A loose mount can cause wiring strain and intermittent connectivity․ Use the provided mounting hardware and follow the instructions carefully․
Compatibility Conflicts: While broadly compatible‚ certain older or specialized HVAC systems may present challenges․ Consult the compatibility information or contact Honeywell support if you suspect a conflict․
Connectivity Problems
Wi-Fi Signal Strength: Weak Wi-Fi signals are a primary cause of connectivity issues․ Ensure the thermostat is within range of your router and consider a Wi-Fi extender if necessary․ Interference from other devices can also impact signal quality․
Incorrect Network Credentials: Double-check the Wi-Fi password and network name entered during setup․ Even a minor typo can prevent successful connection․ Verify your router’s security settings are compatible with the T6 Pro․
Router Compatibility: Some routers may have compatibility issues․ Restarting your router can often resolve temporary glitches․ Ensure your router’s firmware is up-to-date․
Honeywell Server Status: Occasionally‚ Honeywell’s servers may experience outages․ Check the Honeywell support website for any reported service disruptions before troubleshooting further․
Addressing Error Codes
Error Code Documentation: The T6 Pro displays specific error codes to indicate potential problems․ Refer to the comprehensive error code list within this manual or on the Honeywell support website for detailed explanations․
Power Cycle: For many error codes‚ a simple power cycle – turning the thermostat off and then on again – can resolve the issue․ This resets the system and clears temporary errors․
Wiring Verification: Certain error codes point to wiring problems․ Carefully re-examine the wiring connections‚ ensuring they are secure and correctly matched to the wiring diagram․
Professional Assistance: If an error code persists after troubleshooting‚ or if you are uncomfortable working with electrical wiring‚ contact a qualified HVAC technician for assistance․

Technical Specifications
Key Specs: The T6 Pro boasts a lightweight design (35․5g) and IPX4 water resistance‚ ensuring durability․ It’s a digital‚ non-smart thermostat․
Physical Characteristics (Weight‚ Dimensions)
Understanding the T6 Pro’s build is crucial for a smooth installation․ This thermostat is designed with portability and ease of mounting in mind․ Specifically‚ the Honeywell T6 Pro weighs a mere 35․5 grams‚ making it remarkably lightweight and minimizing any strain on mounting surfaces․
While precise dimensional details aren’t explicitly stated in available documentation‚ its compact form factor allows for versatile placement within various home environments․ The unit’s design prioritizes a streamlined aesthetic‚ blending seamlessly with most interior decors․ Its relatively small size ensures it won’t dominate the wall space‚ maintaining a clean and uncluttered look․ Consider these physical attributes when planning the installation location to ensure optimal visibility and accessibility․
Water Resistance (IPX4 Rating)
The Honeywell T6 Pro boasts an IPX4 rating‚ signifying a notable level of protection against water ingress․ This rating indicates the thermostat is safeguarded against splashing water from any direction․ It’s designed to withstand incidental exposure to moisture‚ such as humidity in bathrooms or kitchens‚ and accidental splashes during cleaning․
However‚ it’s crucial to understand the limitations of this rating․ IPX4 does not imply the device is waterproof or submersible․ Avoid direct‚ prolonged exposure to water‚ and never install the T6 Pro in locations prone to complete immersion․ Proper installation‚ away from direct water sources‚ is essential to maintain the device’s functionality and longevity․ This level of protection offers peace of mind in typical household environments․
Compatibility Information
The Honeywell T6 Pro thermostat is designed for broad compatibility with most 24V heating and cooling systems‚ including furnaces‚ air conditioners‚ heat pumps‚ and boilers․ However‚ verifying compatibility before installation is paramount․ It’s generally not compatible with high-voltage systems (110V or 220V) or millivolt systems․
Check your existing wiring to ensure you have a common wire (C-wire)․ A C-wire is often required for consistent power․ If a C-wire isn’t present‚ a C-wire adapter may be necessary (sold separately)․ Consult a qualified HVAC technician if you’re unsure about your system’s compatibility or require assistance with wiring․ Detailed compatibility lists and FAQs are available on the Honeywell Home website for further guidance․