
NuWave Air Fryer Manual: A Comprehensive Guide
Welcome! This guide provides essential information for your NuWave Brio Digital Air Fryer, covering safety, operation, and maintenance for optimal cooking experiences.
Congratulations on choosing the NuWave Air Fryer! This innovative appliance revolutionizes cooking, offering a healthier way to enjoy your favorite fried foods with significantly less oil. The NuWave Brio utilizes rapid air circulation technology to cook food evenly and efficiently, delivering crispy exteriors and tender interiors.
This manual serves as a comprehensive resource, guiding you through every aspect of your air fryer – from initial setup and understanding its features, to mastering cooking techniques and ensuring proper maintenance. Whether you’re a seasoned chef or a kitchen novice, this guide will empower you to unlock the full potential of your NuWave Air Fryer.
Explore a world of culinary possibilities, from perfectly golden french fries and crispy chicken wings to delicious baked goods and more. The included recipe book provides inspiration, while the intuitive controls allow for customized cooking to suit your preferences. Get ready to experience a new era of convenient and healthy cooking!
Understanding Your NuWave Brio Model
The NuWave Brio Digital Air Fryer is engineered for versatility and ease of use. This model, available in various sizes like the 3Q and 14Q, features a digital control panel for precise temperature and time settings. Its core component is the innovative heating system that rapidly circulates hot air, ensuring even cooking and a crispy finish without excessive oil.

Key features include pre-set cooking functions for common dishes, allowing for one-touch operation. Manual controls provide flexibility for customized recipes. The removable fry pan basket simplifies food placement and cleaning. Understanding these components is crucial for maximizing your cooking experience.
The Brio’s design prioritizes safety and convenience. Familiarize yourself with the control panel, basket components, and overall functionality to confidently create delicious meals. Refer to the detailed parts description section for a visual guide to each element of your NuWave Brio.
Important Safety Precautions
Prioritize safety! Always ensure the air fryer is placed on a stable, heat-resistant surface away from flammable materials. Never immerse the unit, cord, or plug in water or other liquids. Avoid operating the appliance with a damaged cord or plug; contact support for assistance.
Exercise extreme caution when handling hot surfaces, utilizing oven mitts or tongs. Do not touch the interior during operation, as components reach high temperatures. Never operate the air fryer unattended. Keep it out of reach of children.
Ensure the fry pan basket is securely locked in place before starting. Avoid overfilling the basket, as this can affect cooking performance and safety. Unplug the unit when not in use and before cleaning. Following these precautions will ensure safe and enjoyable operation of your NuWave Brio.

Parts Description & Identification
Familiarize yourself with your NuWave Brio! The primary components include the main unit housing the heating element and fan, and the removable Fry Pan Basket. This basket consists of the basket itself and a removable basket rack, facilitating versatile cooking options.
The Control Panel is crucial for operation, featuring digital displays for time and temperature, along with preset function buttons. Understanding these controls is key to successful air frying. Inspect all parts before each use, ensuring they are clean and properly assembled.
Refer to the detailed diagrams in the complete manual for precise identification of each component. Proper understanding of these parts will aid in safe operation, cleaning, and maintenance of your NuWave Brio Digital Air Fryer.
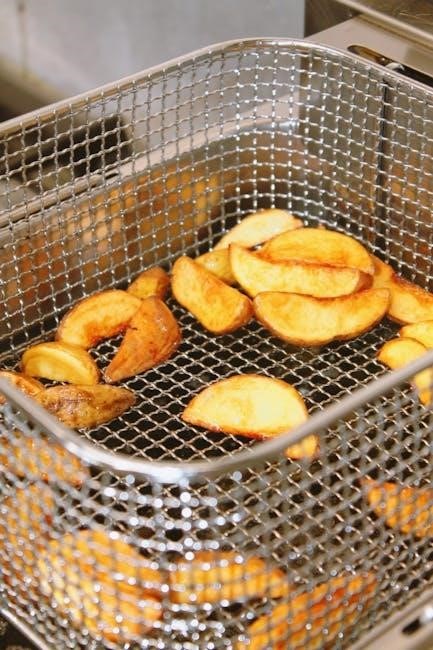
Fry Pan Basket Components
The Fry Pan Basket is central to NuWave cooking! It comprises two key parts: the main basket body, constructed for even heat distribution, and the removable basket rack. This rack elevates food, promoting air circulation for crispier results and preventing sticking.
Ensure the rack is securely positioned within the basket before adding ingredients. The basket features handles for safe removal from the unit, even when hot. Always use oven mitts or pot holders when handling. Proper assembly is vital for optimal performance.
Regularly inspect the basket and rack for any damage or wear. The basket is designed for easy cleaning, and both components are often dishwasher safe (see cleaning instructions). Understanding these components ensures efficient and safe operation.

Control Panel Overview
The NuWave Brio’s control panel is designed for intuitive operation! It features a digital display showing cooking time and temperature. Arrow buttons allow for precise manual adjustments to both settings. Pre-set function buttons offer convenient one-touch cooking for popular dishes like fries, chicken, and steak.

A ‘Start/Pause’ button initiates and temporarily halts the cooking cycle. A ‘Stop’ button completely cancels the operation. The panel also indicates preheating status. Familiarize yourself with each button’s function before use.
The display will countdown the remaining cooking time. Some models include a temperature probe input. Refer to the complete recipe book for specific pre-set function details and recommended settings. Understanding the control panel unlocks the full potential of your air fryer.
Getting Started: Initial Setup
Before your first use, a thorough initial setup is crucial! Carefully unpack your NuWave Brio and remove all packaging materials. Wash the fry pan basket and any included accessories with warm, soapy water – ensure they are completely dry before use. Place the air fryer on a stable, heat-resistant surface with adequate ventilation.
Plug the unit into a grounded electrical outlet. It’s recommended to perform a test run without food. Set the temperature to 350°F (175°C) and the timer for 10 minutes. This helps eliminate any manufacturing residue and familiarizes you with the operation.
During this initial run, a slight odor may be present – this is normal. Ensure the basket is securely in place before starting. Refer to the safety precautions for detailed guidance.

Using the Pre-Set Cooking Functions
The NuWave Brio offers convenient pre-set functions for popular dishes! These simplify cooking by automatically setting the temperature and time. To utilize a pre-set, simply press the corresponding button on the control panel – options typically include fries, chicken, steak, and fish.

Once selected, the air fryer will display the pre-programmed cooking time. You can adjust this time using the arrow buttons if needed, tailoring it to your desired level of doneness. Ensure the food is arranged in a single layer within the fry pan basket for optimal air circulation and even cooking;
Remember to check for doneness using a food thermometer, especially with meat. Pre-sets are a great starting point, but individual results may vary.
Manual Temperature and Time Adjustment
For customized cooking, the NuWave Brio allows full manual control! Easily adjust both temperature and time to perfectly suit your recipe. Use the arrow buttons located above and below the temperature display to increase or decrease the cooking temperature in precise increments.
Similarly, utilize the arrow buttons associated with the timer to set your desired cooking duration. The display will clearly show the selected temperature and remaining time. This feature is ideal for recipes not covered by the pre-set functions, or when you prefer a specific cooking profile.
Remember to monitor your food closely when using manual settings, adjusting as needed to achieve optimal results. Experimentation is encouraged!
Preheating the Air Fryer
Achieving optimal cooking results often begins with preheating your NuWave Brio! Preheating ensures the air fryer reaches the desired temperature before food is introduced, promoting even cooking and a desirable crispy texture. To preheat, simply select your desired temperature using the control panel and press the start button.
The air fryer will initiate the preheating cycle, and the display will indicate the progress. Note: If you remove the Fry Pan Basket during preheating, the cycle will pause. Replace the basket promptly to resume.
Preheating times vary depending on the selected temperature, but the unit will signal when it’s ready. Proper preheating is crucial for consistent and delicious outcomes with your NuWave Air Fryer.
Cooking with the NuWave Air Fryer
Now, let’s get cooking! Once preheated (or if skipping preheating for certain recipes), carefully place your food into the Fry Pan Basket. Ensure food isn’t overcrowded to allow for proper air circulation – this is key for even cooking and crisping.
Insert the basket securely back into the unit. Select your desired preset function or manually adjust the temperature and time as needed; Press the start button to begin the cooking cycle.
Remember to check food periodically during cooking, especially when experimenting with new recipes. You can gently shake or flip food halfway through for more uniform results. Enjoy the convenience and deliciousness of your NuWave Air Fryer!
Recommended Cooking Times & Temperatures
Achieving perfect results depends on the food type and quantity. For French fries, a temperature of 380°F (193°C) for 15-20 minutes, shaking halfway through, yields crispy perfection. Chicken pieces typically require 360°F (182°C) for 20-25 minutes, ensuring they’re cooked through.
Vegetables like broccoli and Brussels sprouts benefit from 375°F (190°C) for 10-12 minutes. Fish fillets cook quickly at 390°F (199°C) for 8-10 minutes. These are starting points; always verify internal temperature with a food thermometer for safety.
Refer to the complete recipe book for detailed guidance on a wider range of dishes. Adjust times slightly based on your desired level of crispness and food thickness.

Adjusting Cooking Times Mid-Cycle
Need more time? During operation, you can easily adjust the cooking time to achieve your desired results. Simply press the “+” or “-” buttons on the control panel to increase or decrease the remaining time in one-minute increments.
Pausing the cycle is also straightforward: carefully remove the Fry Pan Basket – this will temporarily halt the cooking process. Inspect the food, shake or flip it if needed, and then reinsert the basket. The air fryer will automatically resume cooking with the adjusted time.
Remember that removing the basket briefly may cause a slight temperature fluctuation, so consider adding a minute or two to compensate.
Cleaning and Maintenance
Keep it pristine! Regular cleaning ensures optimal performance and longevity of your NuWave Brio Air Fryer. Always unplug the unit and allow it to cool completely before cleaning. The Fry Pan Basket and cooking rack are typically dishwasher safe, offering convenient cleanup. However, hand washing with warm, soapy water is also effective.
For the main unit, wipe down the exterior with a damp cloth. Avoid abrasive cleaners or scouring pads, as they can damage the surface. Never immerse the unit in water or any other liquid. Ensure all components are thoroughly dry before reassembling and using the air fryer. Proper maintenance guarantees delicious results for years to come!
Dishwasher Safe Parts
Effortless cleanup! The NuWave Brio Air Fryer is designed with convenience in mind, and several components are dishwasher safe. Specifically, the Fry Pan Basket and the accompanying cooking rack can be safely cleaned in your dishwasher. This simplifies the post-cooking process, saving you valuable time and effort.
However, it’s recommended to place these parts on the top rack to prevent potential damage from the heating element. While dishwasher use is convenient, hand washing with warm, soapy water is also a viable option, especially for delicate cleaning or if you prefer a more thorough wash. Always ensure all parts are completely dry before reassembling.
Proper Cleaning Procedures
Maintaining peak performance! After each use, disconnect the NuWave Brio and allow it to cool completely before cleaning. Regularly wipe down the exterior with a damp cloth; avoid abrasive cleaners that could damage the finish. For the interior, gently wipe the heating element and base with a soft, damp cloth – never immerse the unit in water.
The Fry Pan Basket and rack benefit from regular cleaning to remove food residue. Use warm, soapy water and a non-abrasive sponge. For stubborn residue, soak the basket in warm water before scrubbing. Ensure all parts are thoroughly dried before reassembly. Avoid using steel wool or harsh chemicals, as these can damage the non-stick coating.
Troubleshooting Common Issues
Addressing typical concerns! If your NuWave Brio isn’t heating, ensure it’s properly plugged in and the timer is set. A tripped circuit breaker can also cause this – check your home’s electrical panel. If food isn’t cooking evenly, try shaking the basket mid-cycle or reducing the food quantity for better air circulation.
Smoke during operation often indicates excessive oil in the food or a buildup of grease in the pan. Reduce oil usage and clean the unit thoroughly. If the timer isn’t functioning correctly, contact customer support. Removing the basket during preheating will pause the cycle; replace it promptly to resume. Always refer to the manual for detailed guidance.
Accessing the Complete Recipe Book
Unlock culinary possibilities! Your NuWave Brio Digital Air Fryer comes with a comprehensive recipe book designed to inspire your cooking journey. This book is packed with delicious and easy-to-follow recipes, specifically tailored for air frying success. It covers a wide range of dishes, from appetizers to main courses and even desserts.
If you’ve misplaced your physical copy, don’t worry! A digital version is readily available for download from the official NuWave website. Simply navigate to the support section and locate the recipe book download link. Explore countless options and elevate your meals with the NuWave Brio – a world of flavor awaits!
Warranty Information & Support
Your satisfaction is our priority! NuWave stands behind the quality of its products with a comprehensive warranty. Please refer to the separate warranty card included with your NuWave Brio Digital Air Fryer for specific details regarding coverage duration and terms. Retain this card for your records, as it will be required for any warranty claims.
For exceptional customer support, NuWave offers multiple channels to assist you. Visit the official NuWave website for FAQs, troubleshooting guides, and contact information. You can also reach our dedicated support team via phone or email. We are committed to providing prompt and helpful assistance to ensure a seamless air frying experience.