
Mitsubishi Mini Split Installation Guide: A Comprehensive Overview
Ductless mini-split systems offer efficient cooling and heating‚ especially where ductwork is absent; however‚ initial costs can be substantial‚ demanding careful planning and professional installation.
Understanding Mini Split Systems
Mini-split systems‚ also known as ductless air conditioners‚ represent a versatile heating and cooling solution‚ particularly beneficial for homes lacking existing ductwork. These systems circumvent the need for extensive installation of ducting‚ making them ideal for additions‚ renovations‚ or spaces where traditional central air isn’t feasible. They operate by transferring heat rather than generating it‚ leading to increased energy efficiency.

A key component is the separation of the indoor and outdoor units‚ connected by refrigerant lines and electrical wiring; This design allows for zoned cooling and heating‚ enabling independent temperature control in different areas of your home. While the upfront investment can be higher than window units‚ the long-term energy savings often offset this initial cost. Careful consideration of BTU capacity and proper installation are crucial for optimal performance.

What is a Mitsubishi Mini Split?
Mitsubishi Mini Splits are a specific brand of ductless heating and cooling systems renowned for their advanced inverter technology and energy efficiency. Unlike traditional systems‚ Mitsubishi units offer precise temperature control and quieter operation. They consist of an indoor unit‚ responsible for air distribution‚ and an outdoor unit‚ housing the compressor.
These systems utilize refrigerant lines to transfer heat‚ requiring only a small opening in the wall for connection. Mitsubishi offers a range of models‚ including single-zone systems for individual rooms and multi-zone systems capable of servicing multiple areas. Their compact design makes them suitable for apartments‚ condos‚ or homes without existing ductwork. Choosing a Mitsubishi system often means investing in long-term reliability and reduced energy consumption.
Benefits of Choosing a Mitsubishi Mini Split
Mitsubishi Mini Splits deliver numerous advantages over traditional HVAC systems. Energy efficiency is a key benefit‚ thanks to inverter technology which adjusts cooling/heating output based on need‚ lowering bills. Zoned heating and cooling allows independent temperature control in different rooms‚ optimizing comfort and reducing wasted energy.
Installation is often simpler and less disruptive than installing ductwork‚ making them ideal for older homes or additions. These systems are also quieter than window units or central AC. While the initial investment might be higher‚ long-term savings on energy costs and increased home value often offset this. Ductless design improves indoor air quality by minimizing dust and allergen circulation within ductwork.

Pre-Installation Planning & Considerations

Careful assessment of your space is crucial; determining BTU needs and optimal unit placement ensures efficient operation and maximizes the benefits of your mini-split system.
Assessing Your Cooling Needs
Before diving into installation‚ accurately evaluating your cooling requirements is paramount. Consider the square footage of the area you intend to cool‚ alongside factors like insulation quality‚ window size and direction‚ and typical sun exposure. Rooms with significant sunlight or poor insulation will necessitate a higher cooling capacity.
Furthermore‚ account for the number of occupants and heat-generating appliances within the space. A kitchen‚ for instance‚ will require more cooling power than a bedroom. Ductless mini-splits excel at zoning‚ allowing you to cool only occupied areas‚ but proper sizing is still essential for comfort and efficiency. Ignoring these factors can lead to an undersized unit struggling to maintain temperature or an oversized unit cycling on and off frequently‚ reducing efficiency and lifespan.
Determining the Right BTU Capacity
Calculating the appropriate BTU (British Thermal Unit) capacity is crucial for optimal performance. A general rule of thumb is to estimate 20 BTU per square foot‚ but this is a starting point. Adjustments are needed based on the factors identified during your cooling needs assessment.
For example‚ rooms with high ceilings or significant sun exposure may require 25-30 BTU per square foot. Conversely‚ well-insulated spaces with minimal sunlight might only need 15 BTU per square foot. Mitsubishi mini-splits offer a range of BTU capacities; selecting the closest match to your calculated needs ensures efficient operation and prevents the unit from working excessively hard or short-cycling. Consulting a professional HVAC technician is highly recommended for precise calculations and system recommendations.
Indoor & Outdoor Unit Placement
Strategic placement of both indoor and outdoor units is vital for efficiency and aesthetics. The indoor unit should be positioned for optimal airflow‚ avoiding direct sunlight‚ heat sources‚ and obstructions like furniture. Consider wall space and ensure sufficient clearance for maintenance.
The outdoor unit requires a well-ventilated location‚ protected from extreme weather and debris. Avoid placing it in enclosed spaces or near flammable materials. Ensure adequate space around the unit for servicing and airflow – typically at least 12 inches on all sides. Ductless mini-splits are ideal for apartments lacking traditional ductwork‚ offering flexible installation options. Proper placement minimizes noise and maximizes cooling/heating effectiveness.

Tools and Materials Required
Essential tools include a vacuum pump‚ flaring kit‚ and multimeter. Necessary components are refrigerant lines‚ electrical wiring‚ mounting brackets‚ and a comprehensive installation kit.
Essential Tools for Installation
A successful Mitsubishi mini-split installation demands a specific toolkit. First‚ a high-quality vacuum pump is crucial for evacuating air and moisture from the refrigerant lines‚ ensuring optimal system performance and longevity. A flaring kit is essential for creating precise‚ leak-proof connections between copper lines.
Electrical testing tools‚ such as a multimeter‚ are vital for verifying proper voltage and current during wiring. You’ll also need a set of tube cutters for cleanly cutting refrigerant lines‚ and a torque wrench to tighten fittings to the manufacturer’s specifications.
Drills with various bit sizes are necessary for mounting units and creating holes for line sets. Don’t forget safety gear like gloves and safety glasses. Finally‚ a level ensures proper indoor unit alignment‚ and a wire stripper/crimper is needed for electrical connections.
Necessary Components & Installation Kit
Beyond the tools‚ a complete installation requires specific components. A standard Mitsubishi mini-split kit includes the indoor unit (evaporator) and outdoor unit (condenser). Refrigerant lines – typically copper – are essential for connecting the units‚ alongside insulation to prevent energy loss.
Electrical wiring‚ including appropriate gauge wire and conduit‚ is needed for power connections. A drain line is crucial for condensate removal‚ preventing water damage. Many kits include a mounting bracket for the outdoor unit and a wall mounting plate for the indoor unit.
Remote controller and its wiring are also included. Depending on the system‚ you might need a line set cover for aesthetic purposes and additional electrical disconnect switches for safety. Ensure the kit matches the BTU capacity of your chosen system.

Installation Process: Step-by-Step
Proper installation involves mounting units‚ drilling for lines‚ connecting refrigerant and electrical components‚ and finally‚ installing the outdoor unit securely for optimal performance.
Mounting the Indoor Unit
Careful indoor unit placement is crucial for efficient operation. Select a location allowing for unobstructed airflow‚ avoiding direct sunlight and heat sources. Ensure the wall can support the unit’s weight; reinforced mounting brackets are often necessary‚ especially on drywall.
Begin by marking the mounting bracket positions‚ ensuring they are level. Drill pilot holes and securely attach the bracket to the wall. Gently lift the indoor unit onto the bracket‚ verifying it’s firmly seated.
Consider the proximity to electrical outlets and the planned routing for refrigerant lines. Precise leveling is vital to prevent operational issues and noise. Double-check all connections before proceeding to the next step‚ guaranteeing a stable and secure installation. Proper mounting minimizes vibration and maximizes the unit’s lifespan.
Drilling the Hole for Refrigerant Lines
Creating the wall penetration for refrigerant lines requires precision and care. Determine the shortest‚ most direct path between the indoor and outdoor units‚ minimizing line length for optimal efficiency. Use a core drill bit sized appropriately for the refrigerant lines‚ drain hose‚ and electrical conduit.
Angle the drill slightly downwards from the exterior to facilitate condensate drainage. Be extremely cautious when drilling through exterior walls‚ checking for hidden wiring or plumbing. Seal the hole thoroughly with weatherproof sealant after running the lines to prevent air leaks and moisture intrusion.
Proper sealing is critical for maintaining energy efficiency and preventing damage. Consider using a sleeve or grommet to protect the lines where they pass through the wall‚ ensuring a neat and professional finish. Always adhere to local building codes regarding wall penetrations.
Connecting Refrigerant Lines & Electrical Wiring
Carefully connect the refrigerant lines‚ ensuring tight‚ leak-proof fittings. Use nitrogen during brazing to prevent oxidation inside the lines. Incorrect connections can lead to system failure and refrigerant leaks‚ impacting efficiency and the environment.
Properly route and secure the electrical wiring‚ adhering to all local electrical codes. Connect the power supply to the indoor and outdoor units‚ verifying correct voltage and polarity. Grounding is essential for safety.
Double-check all connections before proceeding. Use appropriate wire connectors and weatherproof enclosures for outdoor connections. A qualified electrician should handle any complex electrical work. Incorrect wiring can cause malfunctions or pose a fire hazard.
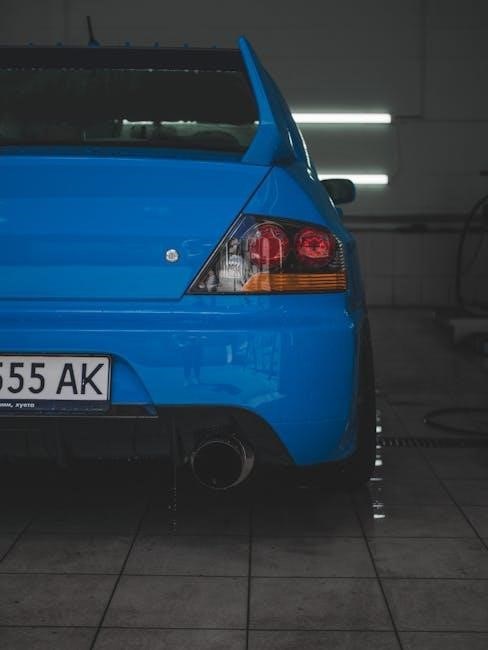
Installing the Outdoor Unit
Select a level‚ stable location for the outdoor unit‚ ensuring adequate airflow and protection from direct sunlight and harsh weather. Maintain sufficient clearance around the unit for service access and proper ventilation. A concrete pad is often recommended for stability.
Securely mount the outdoor unit‚ using appropriate brackets and fasteners. Ensure the unit is vibration-isolated to minimize noise transmission. Connect the refrigerant lines and electrical wiring‚ following manufacturer’s instructions and local codes.
Protect wiring from physical damage and weather exposure. Consider a weather shield for added protection. Verify proper grounding. A professional installation ensures optimal performance and longevity of the outdoor unit.

Post-Installation Checks & Maintenance
Post-installation involves vacuuming‚ charging refrigerant‚ leak testing‚ and system functionality checks; regular filter cleaning and coil maintenance ensure optimal performance and longevity.
Vacuuming and Charging the Refrigerant Lines
Properly vacuuming the refrigerant lines is crucial to remove air and moisture‚ preventing system inefficiencies and potential damage. This process utilizes a vacuum pump connected to the lines‚ drawing a deep vacuum for a specified duration – typically around 30-60 minutes – to ensure complete evacuation.
Following evacuation‚ the system requires charging with the correct refrigerant type and amount‚ as specified by Mitsubishi for the particular model. Incorrect refrigerant levels can severely impact performance and even cause compressor failure.
This charging process involves carefully connecting a manifold gauge set to the service ports and introducing the refrigerant‚ monitoring pressures closely. Precise measurements are essential‚ and overcharging or undercharging must be avoided; Technicians often refer to pressure-temperature charts to verify accurate refrigerant levels during this critical step.
Testing the System for Leaks
Rigorous leak testing is paramount after charging the refrigerant lines to guarantee system integrity and prevent refrigerant loss‚ which diminishes cooling capacity and harms the environment. Technicians employ various methods‚ including using an electronic leak detector to scan all connections – flares‚ brazed joints‚ and service ports – for escaping refrigerant.
Another common practice involves applying a soap bubble solution to joints; the formation of bubbles indicates a leak. Nitrogen pressure testing is also frequently used‚ pressurizing the lines with nitrogen to identify weak points.
Any detected leaks must be addressed immediately by tightening connections or re-brazing joints‚ followed by another leak test to confirm the repair. Thorough leak testing ensures long-term system reliability and optimal performance‚ safeguarding against costly future repairs and refrigerant replacement.
Initial System Startup & Functionality Check
Following a successful leak test‚ the initial system startup is crucial. Power up both the indoor and outdoor units‚ and verify the Mitsubishi mini-split responds correctly to the remote control. Confirm the fan operates at various speeds‚ and the system transitions seamlessly between cooling‚ heating (if applicable)‚ and auto modes.
Check the temperature differential between the supply and return air to ensure effective cooling or heating. Monitor the outdoor unit for proper fan operation and compressor engagement. Listen for any unusual noises that might indicate a problem.
Verify all safety features are functioning as intended‚ including overload protection and automatic defrost. A comprehensive functionality check confirms the system operates within Mitsubishi’s specifications‚ delivering optimal comfort and efficiency from the outset.
Regular Maintenance Tips for Longevity
To maximize the lifespan and efficiency of your Mitsubishi mini-split‚ consistent maintenance is key. Regularly clean or replace the air filters – typically monthly – to maintain optimal airflow and indoor air quality. Inspect the outdoor unit‚ removing any debris like leaves or branches that could obstruct airflow.
Periodically clean the indoor unit’s coils with a specialized coil cleaner to ensure efficient heat transfer. Schedule professional maintenance annually‚ including a thorough system inspection‚ refrigerant level check‚ and component cleaning.
Address any unusual noises or performance issues promptly. Proper maintenance prevents costly repairs and ensures your Mitsubishi mini-split continues to provide reliable comfort for years to come‚ saving energy and extending its operational life;

Cost Considerations
Initial installation expenses for mini-splits can be higher than window units‚ but long-term energy savings often offset this; consulting with professionals is recommended for accurate quotes.
Average Installation Costs
Determining the average cost of a Mitsubishi mini-split installation requires considering several factors‚ including the system’s size (BTU capacity)‚ the number of indoor units‚ and the complexity of the installation. Generally‚ expect to pay between $3‚000 and $8‚000 for a single-zone system‚ encompassing both the unit itself and professional labor. Multi-zone systems‚ serving multiple rooms‚ naturally increase the price‚ potentially reaching $10‚000 to $15‚000 or more.
Installation labor typically accounts for a significant portion of the overall cost‚ varying based on location and installer rates. Complex installations‚ requiring extensive electrical work or challenging refrigerant line routing‚ will incur higher labor charges. Furthermore‚ additional costs may arise from necessary electrical upgrades or the need for custom ductwork adaptations‚ even though mini-splits are often ductless. Obtaining quotes from multiple qualified installers is crucial for comparing prices and ensuring a fair estimate.
Comparing Costs to Central AC Systems
When evaluating costs‚ comparing Mitsubishi mini-split systems to traditional central air conditioning is essential. While the initial investment for a mini-split can sometimes exceed that of a central AC unit – particularly for whole-house coverage – long-term operational savings often offset this difference. Central AC systems incur energy losses through ductwork‚ whereas mini-splits deliver conditioned air directly to the intended space‚ maximizing efficiency.
Central AC installation also requires existing ductwork‚ which can be a significant expense if absent. Mini-splits bypass this need‚ making them ideal for additions or homes without pre-existing ducts. However‚ for homes already equipped with ducts‚ a central AC replacement might be more cost-effective upfront. Considering energy bills‚ zoning capabilities (cooling only occupied rooms)‚ and potential duct repair/replacement costs provides a comprehensive cost comparison.