French Manicure: A Comprehensive Guide
French tip application can be streamlined using guides or stickers‚ ensuring a consistently crisp‚ clean line for both beginners and experienced nail enthusiasts.
Understanding the Classic French Manicure
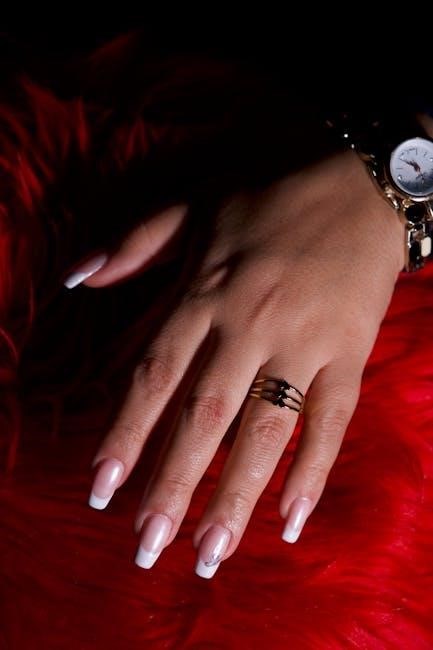
The quintessential French manicure embodies timeless elegance‚ characterized by a delicate nude or pink base complemented by a precisely defined white tip. Achieving this iconic look often involves utilizing french tip guides or stickers. These tools simplify the process‚ particularly for those newer to nail art‚ guaranteeing a uniform and polished finish.
They eliminate the need for a steady hand during freehand application‚ reducing smudges and ensuring symmetry. Mastering the technique with guides builds confidence‚ paving the way for more advanced variations later on.
Historical Background of the French Manicure
While the French manicure’s origins aren’t French‚ its modern iteration emerged in 1976 in Hollywood. Nail designer Jeff Pink created a natural look for film sets‚ needing a quick‚ universally flattering style. To simplify achieving a clean line‚ Pink innovated with french tip guides – small stickers aiding precise application.
These guides democratized the look‚ allowing anyone to replicate the sophisticated aesthetic. This practical solution became integral to the manicure’s enduring popularity and widespread adoption.
Benefits of a French Manicure
Utilizing french tip guides offers several advantages. They provide a consistently neat‚ professional finish‚ particularly beneficial for those less confident with freehand painting. Guides minimize polish smudges and uneven lines‚ saving time and reducing frustration.
Furthermore‚ they allow for experimentation with different tip shapes and widths‚ enhancing creativity. Ultimately‚ guides empower anyone to achieve a classic‚ elegant French manicure with ease and precision.

Preparation is Key: Nail Care Basics
Proper nail prep is crucial; consider french tip guides for a clean line after shaping‚ cuticle care‚ and smoothing the nail surface effectively.
Nail Shaping Techniques for French Manicures
Achieving the perfect French manicure begins with expertly shaped nails. Whether you prefer square‚ oval‚ or almond‚ consistent shaping is key. French tip guides can assist in maintaining a uniform smile line regardless of the chosen shape. Square nails offer a bold look‚ while ovals and almonds provide a softer‚ more elegant aesthetic.
For beginners‚ utilizing a guide during filing can prevent unevenness. Remember to file in one direction to avoid weakening the nail. A well-shaped nail enhances the overall appearance and allows for a flawless French tip application‚ maximizing the manicure’s impact.
Cuticle Care: Pushing and Trimming
Proper cuticle care is crucial for a professional-looking French manicure. Gently pushing back cuticles creates a larger nail surface for polish application‚ especially important when defining the french tip. Avoid aggressive trimming‚ as this can lead to infection. Instead‚ use a cuticle remover to soften the skin before gently pushing it back with a cuticle pusher.
Maintaining healthy cuticles prevents polish from lifting and ensures a clean‚ polished finish. Remember‚ healthy nail beds are the foundation for a beautiful and long-lasting French manicure.
Buffing and Smoothing the Nail Surface
Before applying any polish‚ buffing the nail surface is essential for a flawless French manicure. This process removes ridges and imperfections‚ creating a smooth canvas for the sheer base and crisp french tip. Use a fine-grit buffer‚ gently smoothing the entire nail plate.
Avoid over-buffing‚ as this can weaken the nails. A smooth surface ensures even polish application and prevents streaks‚ contributing to a professional and long-lasting result.
Choosing the Right Products
Selecting quality products is vital; a precise brush is key for a defined french tip‚ alongside a durable top coat for lasting shine and protection.
Base Coat Selection for Longevity
A robust base coat is paramount for a French manicure’s durability‚ preventing staining and promoting adhesion of the sheer and white polishes. Consider a ridge-filling base coat if your nails have imperfections‚ creating a smooth canvas for the french tip. Look for formulas specifically designed to work with lighter shades‚ avoiding any discoloration.
Ensure the base coat fully dries before applying color; this prevents bubbling and ensures a clean line when defining the french tip. A quality base coat extends the manicure’s life‚ minimizing chips and peeling‚ ultimately preserving the classic look.
Nude or Sheer Polish Shades
Selecting the perfect nude or sheer polish is crucial for a flawless French manicure. The shade should complement your skin tone‚ creating a natural and subtle base for the bright french tip. Opt for formulas that are self-leveling‚ minimizing brush strokes and ensuring even coverage.
Consider a sheer pink or beige; these tones enhance the nail’s natural color without overpowering the iconic white french tip. Applying thin coats is key to achieving a delicate‚ buildable color.
White Polish: Formula and Opacity
The white polish used for the french tip demands careful consideration. A highly pigmented formula is essential for achieving a crisp‚ opaque line‚ often requiring only one or two coats. Look for polishes specifically designed for French manicures‚ as they typically offer superior coverage and a smooth application.
Avoid sheer or watery formulas‚ as they may necessitate multiple coats‚ potentially leading to a messy or uneven french tip. A brush designed for precision is also beneficial.
Mastering the French Tip Application
Achieving a perfect french tip involves mastering techniques like freehand painting‚ utilizing guides‚ and selecting the appropriate brush for precise‚ clean lines.
Traditional Freehand Technique
The traditional freehand technique demands a steady hand and a quality brush to create the classic French manicure tip. Begin by visualizing the desired curve‚ then gently guide the brush along the nail’s edge‚ building the white line with controlled strokes.
Practice is crucial for achieving consistency; start with light pressure and gradually increase opacity. Utilizing a thin brush allows for greater precision‚ minimizing the risk of smudging. Remember to wipe the brush frequently to maintain a clean line and avoid polish buildup. This method offers ultimate customization!
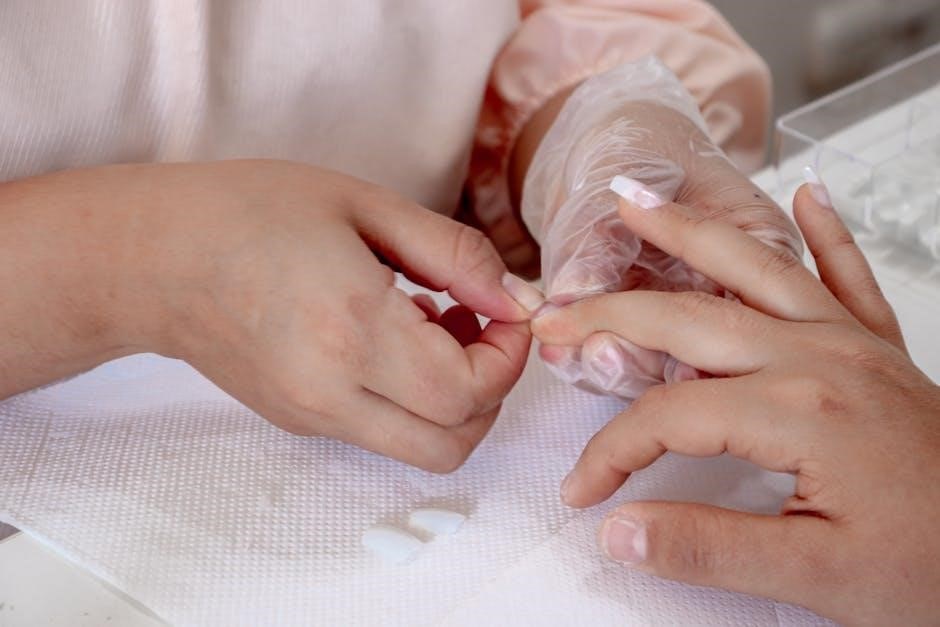
Using French Manicure Guides and Stickers
French manicure guides and stickers provide a convenient solution for achieving perfectly shaped tips‚ especially for those new to the technique. These self-adhesive tools create a clean boundary‚ preventing polish from bleeding underneath.
Apply the guide firmly to the nail‚ ensuring a snug fit along the desired tip line. Paint over the exposed nail area with white polish‚ then carefully peel off the guide while the polish is still wet. This results in a crisp‚ professional-looking French manicure with minimal effort!
Brush Selection for Precise Lines
Achieving a flawless French tip relies heavily on the right brush. A thin‚ angled brush is ideal for creating sharp‚ defined lines. Synthetic brushes offer excellent control and are easy to clean.
Ensure the brush has a consistent shape and firm bristles. Dip the brush lightly into white polish‚ wiping off any excess. Practice applying even pressure for a smooth‚ consistent line. A quality brush significantly elevates the precision and overall look of your French manicure.
Advanced Techniques & Variations
Explore modern twists like reverse French‚ or experiment with diverse hues for the tips‚ adding a personalized and contemporary flair to the classic look.
Reverse French Manicure: A Modern Twist
The reverse French manicure flips the script on the traditional design‚ applying the contrasting color to the cuticle line instead of the free edge. This creates a bold‚ unexpected look that’s both chic and contemporary.
Utilizing guides or freehand techniques‚ carefully apply the white (or chosen color) along the base of the nail‚ ensuring a clean‚ defined line. This variation offers a subtle yet striking alternative‚ perfect for those seeking a modern update to the classic French aesthetic.
Colored French Tips: Exploring Different Hues
Beyond the classic white tip‚ a world of color awaits! Experimenting with different hues transforms the French manicure into a playful and personalized statement. From pastel shades to vibrant neons‚ the possibilities are endless.
Guides can assist in achieving precise lines with bolder colors. Consider using tape or specialized stickers for a clean finish. Don’t be afraid to explore gradients or even glitter accents for a unique‚ eye-catching twist on this timeless design.
Micro French: Subtle and Elegant
The micro French manicure offers a modern‚ minimalist take on the classic. This style features an incredibly thin line at the tip‚ creating a subtle yet sophisticated look. Precision is key‚ making guides invaluable for achieving a neat‚ uniform finish.
Utilize very fine-tipped brushes or specialized micro-French stickers to ensure the line is delicate and proportionate to the nail. This understated elegance is perfect for those seeking a refined and contemporary aesthetic.

Troubleshooting Common Issues
For uneven french tip lines‚ carefully refine with a thin brush and steady hand‚ or utilize guides for a consistently perfect‚ polished appearance.
Preventing Smudges and Streaks
Achieving a flawless French manicure hinges on preventing smudges and streaks‚ especially during the delicate french tip application. Allow each coat of polish – base‚ nude/sheer‚ and white tip – to completely dry before proceeding.
Utilizing thin‚ even coats minimizes the risk of bubbling and streaking. Consider applying a quick-dry top coat immediately after the final white tip layer to seal and protect your design. Avoid touching the freshly painted nails‚ and be mindful of clothing or objects that could potentially disrupt the surface while drying.
Fixing Uneven French Tip Lines
Even with french tip guides‚ slight imperfections can occur. A fine-tipped nail art brush dipped in acetone can correct uneven lines with precision. Gently clean up any wobbles or asymmetry‚ working slowly and deliberately.
Alternatively‚ a clean-up brush and polish remover can refine the white smile line. For minor inconsistencies‚ a fresh coat of white polish can often smooth out the appearance. Patience is key – small corrections yield the best results!
Dealing with Polish Bubbles
Polish bubbles can mar a pristine french tip manicure. Often caused by thick polish or vigorous brushstrokes‚ prevention is best. Apply thin‚ even coats and avoid shaking the bottle – roll it instead.
If bubbles appear‚ a quick blast from a hairdryer on a cool setting can sometimes dissipate them. For stubborn bubbles‚ a toothpick can carefully pop them‚ followed by a smoothing topcoat layer. Patience and gentle handling are crucial!
Long-Lasting French Manicure Tips
A quality top coat seals the french tip‚ while hydrating cuticles prevents lifting and chipping‚ extending the manicure’s lifespan and polished appearance.
Proper Top Coat Application
Applying a top coat is crucial for a long-lasting French manicure. Ensure complete coverage‚ “wrapping” the free edge of the nail – including the delicate french tip – to prevent chipping.
Use thin‚ even coats‚ allowing each to dry fully before applying the next. Avoid flooding the cuticle‚ as this can cause lifting. A gel top coat offers superior durability‚ requiring curing under a UV or LED lamp.
Regular reapplication of top coat every other day can further extend the life of your manicure‚ maintaining a glossy and pristine finish.
Hydrating Cuticles for a Polished Look
Maintaining hydrated cuticles is essential for a flawless French manicure. Dry cuticles can lead to peeling and a less refined appearance‚ detracting from the crisp french tip.
Regularly apply cuticle oil‚ ideally several times a day‚ to nourish and soften the skin. Gently massage the oil into the cuticles to promote healthy growth.
Avoid harsh cuticle removers and opt for gentle pushing instead of aggressive trimming. Well-hydrated cuticles contribute significantly to the overall polished aesthetic.
Avoiding Water Exposure After Manicure
Protecting your French manicure from excessive water exposure is crucial for longevity. Water can cause the polish to lift and the delicate french tip to become chipped or blurred‚ diminishing its pristine appearance.
For the first few hours‚ and ideally for 24 hours‚ after application‚ minimize activities like dishwashing or prolonged hand immersion.
When handwashing is necessary‚ use cool or lukewarm water and a mild soap‚ and dry hands thoroughly. Gloves are your best friend during chores!
French Manicure for Different Nail Shapes
Adapting the french tip’s curve to match nail shape—square‚ oval‚ or almond—enhances the manicure’s aesthetic balance and overall polished appearance.
French Manicure on Square Nails
French manicure tip guides are particularly helpful for square nails‚ as achieving a straight‚ defined line can be challenging. Stickers offer a clean edge‚ while freehand requires a steady hand and precise brush control.
Consider slightly rounding the corners of the white tip to soften the square shape and prevent a harsh look. Ensure the white line mirrors the straight edge of the nail‚ avoiding any angling. A thicker white polish application can also enhance visibility on broader square nails‚ creating a classic‚ balanced aesthetic.
French Manicure on Oval Nails
French manicure tip guides can assist in creating a graceful curve on oval nails. Stickers should be carefully applied‚ following the natural contour of the nail‚ to avoid a disjointed appearance.
For a freehand approach‚ a slightly rounded brush stroke is essential. The white tip should gently follow the oval shape‚ creating a harmonious and elegant look. A thinner white line often complements oval nails‚ enhancing their delicate and elongated form‚ offering a sophisticated finish.
French Manicure on Almond Nails
French manicure tip guides are incredibly helpful for almond-shaped nails‚ ensuring the white line mirrors the nail’s tapered form. Stickers should be positioned to accentuate the elegant point‚ creating a balanced aesthetic.
When applying freehand‚ a brush with a slight angle is key. The white tip should follow the almond’s curve‚ becoming narrower towards the free edge. This technique elongates the nail and provides a refined‚ sophisticated look‚ enhancing the nail’s natural beauty.
DIY vs. Professional French Manicure
Utilizing french tip guides simplifies the DIY process‚ offering a clean line comparable to professional results‚ though skill and precision vary greatly.
Cost Comparison: DIY vs. Salon
Employing french tip guides for a do-it-yourself manicure significantly reduces costs compared to a salon visit. A basic kit – polish‚ base/top coat‚ and guides – typically ranges from $20-$50‚ offering multiple applications. Salon French manicures generally cost between $35-$60 per session‚ varying by location and salon prestige.
While initial DIY investment exists‚ long-term savings are substantial. Guides ensure a professional-looking finish‚ minimizing the need for frequent‚ expensive salon appointments. However‚ factor in potential polish replacements and the value of your time when calculating overall cost-effectiveness.
Benefits of Professional Application
A skilled technician utilizing french tip guides‚ or employing freehand techniques‚ delivers a flawlessly symmetrical and polished result. Professional application ensures precise lines and a smooth gradient‚ minimizing imperfections often encountered during DIY attempts. Salons offer access to high-quality polishes and tools‚ enhancing longevity and durability.
Beyond aesthetics‚ professional manicures prioritize nail health‚ with proper cuticle care and shaping. Technicians can also advise on suitable products and address specific nail concerns‚ providing a comprehensive and relaxing experience.
Tools and Equipment Needed for DIY
For a successful DIY french tip manicure‚ gather essential tools: a base coat‚ sheer pink or nude polish‚ a crisp white polish‚ and a top coat. French manicure guides or stickers are crucial for achieving clean lines‚ especially for beginners. You’ll also need a fine-tipped brush for corrections‚ nail polish remover‚ cotton swabs‚ and a buffer for smoothing.
Don’t forget cuticle pushers and nippers for preparation‚ and a steady hand – practice makes perfect!
Maintaining Your French Manicure
Regular touch-ups along the french tip line extend manicure life‚ while gentle polish removal prevents nail damage and preserves overall health.
Touch-Up Techniques for Growing Nails
As natural nails grow‚ the visible gap between cuticle and french tip becomes noticeable‚ diminishing the manicure’s pristine appearance. A simple touch-up involves carefully applying white polish to the exposed edge‚ blending it seamlessly with the existing tip.
Utilize a fine-tipped brush for precision‚ and consider using French manicure guides or stickers to maintain a consistent shape. Alternatively‚ a sheer pink or nude polish can subtly camouflage the growth‚ extending the manicure’s longevity without a full reapplication. Frequent‚ small touch-ups are key!
Removing Polish Without Damage
Proper polish removal is crucial for maintaining nail health after a french tip manicure. Avoid harsh‚ acetone-based removers‚ opting instead for acetone-free formulas‚ though they may require a bit more patience.
Saturate a cotton pad and hold it firmly on the nail for several seconds before gently wiping away the polish. Repeated rubbing can weaken the nail plate. Hydrate nails immediately post-removal with cuticle oil to restore moisture and prevent brittleness‚ ensuring a healthy base for your next manicure.
Regular Nail Care Between Manicures
Maintaining a french tip manicure’s longevity requires consistent nail care. Daily cuticle oil application prevents dryness and peeling‚ crucial for a polished appearance. Avoid using nails as tools‚ which can cause breakage and compromise the clean lines of your French tips.
Gentle filing can address minor snags‚ and a strengthening base coat used in subsequent manicures promotes nail health. Hydration is key – drink plenty of water to support overall nail strength and flexibility.
Trending French Manicure Styles (2026)
Modern takes on the french tip include geometric designs‚ double French lines‚ and abstract art‚ offering a fresh‚ innovative spin on the classic look.
Geometric French Tips
Geometric French tips represent a bold departure from the traditional curved line‚ embracing sharp angles and modern shapes. Instead of the classic smile‚ consider triangles‚ squares‚ or even asymmetrical designs at the nail’s edge.
Utilizing french tip guides can still be beneficial‚ but require careful placement and potentially cutting to achieve the desired geometric form. Precision is key; a fine-tipped brush and steady hand are essential for clean lines. Experiment with color blocking within the geometric shapes for an even more striking effect‚ pushing the boundaries of this evolving trend.
Double French Manicure
The Double French Manicure elevates the classic look by adding a second‚ thinner french tip line directly above the original. This creates a layered effect‚ adding depth and visual interest to the nails. Achieving this requires exceptional precision and a steady hand.
Using french tip guides is crucial for maintaining consistent width and placement of both lines. A thin brush is essential for the second line‚ ensuring it doesn’t overwhelm the first. Experiment with contrasting colors for a bolder statement or subtle shades for a refined aesthetic.
Abstract French Designs
Abstract French Designs move beyond the traditional curved french tip‚ embracing asymmetry and artistic expression. Think jagged lines‚ geometric shapes‚ or color blocking instead of a uniform band. These designs require a creative eye and a willingness to experiment;
While french tip guides can offer a starting point‚ freehand artistry is often preferred. Utilize striping tape to create clean‚ angular lines. Don’t be afraid to incorporate multiple colors and textures for a truly unique and modern manicure.