KidKraft Dollhouse Instructions: A Comprehensive Guide
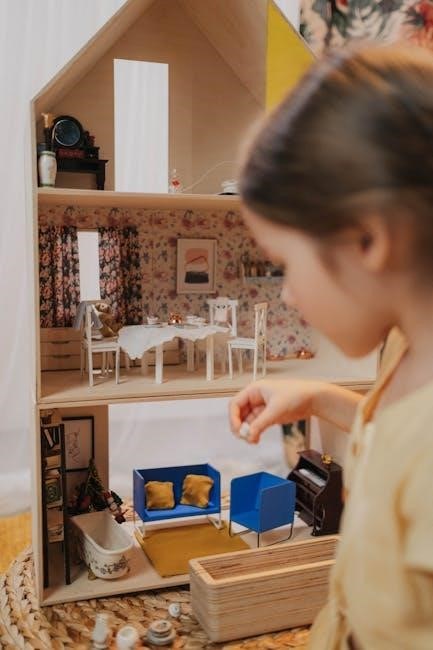
Navigating the world of KidKraft dollhouses requires understanding assembly, maintenance, and troubleshooting; this guide offers detailed instructions and support for a delightful building experience.
Understanding KidKraft Dollhouse Models
KidKraft offers a diverse range of dollhouses, each with unique features and complexities. From the grand Majestic Mansion to the charming Kaylee Dollhouse and expansive Deluxe Play Around Dollhouse, understanding the specific model is crucial before beginning assembly.
Models vary significantly in size, number of rooms, included furniture, and assembly difficulty. Some, like the Deluxe Play Around, are designed for multiple children, while others are more compact.
Each dollhouse is typically constructed from MDF and solid wood, originating from China. Identifying your specific model – often found on the product packaging or a sticker on the bottom/back of the dollhouse itself – allows you to access the correct, tailored assembly instructions. Knowing the item number (e.g., 65183 for the Deluxe Play Around) is also vital for locating resources.
Popular KidKraft Dollhouse Series
KidKraft boasts several highly popular dollhouse series, each catering to different play styles and preferences. The Majestic Mansion stands out as a flagship model, known for its detailed design and spacious layout, often requiring approximately one hour for assembly by a single person.
The Kaylee Dollhouse (model 65869) is another favorite, offering a more compact yet equally charming option. The Deluxe Play Around Dollhouse (item 65183) is particularly well-suited for collaborative play, accommodating multiple children simultaneously.
Beyond these, KidKraft frequently releases limited-edition and themed dollhouses, such as the Celeste Mansion and Chefs Cook N Create Island, expanding the options available. These series consistently receive positive reviews for their quality construction, aesthetic appeal, and the immersive play experience they provide.
Locating Your Dollhouse’s Instructions
Finding the correct instructions for your KidKraft dollhouse is the first step towards a successful assembly. Traditionally, a printed instruction manual is included directly within the product packaging, often found at the bottom or back of the box. These paper instructions provide a step-by-step guide, detailing each stage of the building process.
However, KidKraft also embraces modern technology. For many models, particularly newer releases, digital instructions are readily available. These can be accessed through the BILT app, offering interactive 3D assembly guidance. Alternatively, you can download instructions directly from the KidKraft website, searching by item number or dollhouse name.
Always ensure you have the instructions specific to your dollhouse model, as variations exist between series like the Majestic Mansion and the Kaylee Dollhouse.
Digital Instructions via the BILT App
The BILT app provides a revolutionary approach to KidKraft dollhouse assembly, moving beyond traditional paper manuals. This free application delivers interactive, 3D assembly instructions directly to your smartphone or tablet, offering a visually engaging and easy-to-follow experience.
BILT’s step-by-step guidance allows you to rotate the dollhouse model, zoom in on specific components, and clearly understand each connection point. This is particularly helpful for complex builds like the Majestic Mansion or the Deluxe Play Around Dollhouse. The app eliminates confusion and reduces the potential for errors during assembly.
Accessing instructions is simple: download the BILT app, search for your KidKraft dollhouse model (identified by its item number), and begin the guided build. It’s a modern, convenient, and effective way to bring your dollhouse to life!
KidKraft Website Instruction Downloads
For those preferring a traditional approach, KidKraft offers downloadable instruction manuals directly from their official website, kidkraft.com; These PDFs provide detailed, step-by-step guidance for assembling your chosen dollhouse model. Locating the correct manual is straightforward; simply navigate to the product page of your specific dollhouse.
Typically, you’ll find a dedicated “Instructions” or “Assembly” section where the PDF document is readily available for download. These manuals often include parts lists, diagrams, and clear illustrations to assist throughout the building process. This resource is particularly useful if you prefer to print the instructions for easy reference during assembly.
Ensure you have a stable internet connection and a PDF reader installed on your device to access and view the downloaded files. KidKraft’s website is a reliable source for accurate and up-to-date assembly information.
Preparing for Assembly
Before embarking on your KidKraft dollhouse assembly journey, proper preparation is key to a smooth and enjoyable experience. Begin by carefully unpacking all components and verifying against the parts list included in the packaging. Clear a spacious, well-lit workspace, protecting the floor with a drop cloth or cardboard to prevent scratches.
Review the instructions thoroughly, familiarizing yourself with the assembly sequence and identifying any potentially challenging steps. It’s beneficial to sort the hardware – screws, dowels, and other fasteners – into labeled containers for easy access. Having everything organized beforehand will significantly streamline the process.
Consider having a second person assist, especially during the initial stages of foundation and wall construction. This collaborative approach can make handling larger pieces much easier and more efficient. Patience and a methodical approach are your allies!
Tools Required for Assembly
Assembling your KidKraft dollhouse is generally straightforward, but having the right tools at hand will make the process significantly easier and more efficient. A Phillips head screwdriver is essential, and a power screwdriver with adjustable torque settings can speed things up, but use caution to avoid over-tightening.
A rubber mallet is incredibly useful for gently tapping pieces together, particularly when using dowels. While not always necessary, a level can ensure the dollhouse is stable and doesn’t wobble; A soft cloth is recommended to protect the finish while applying pressure or tightening screws.
Occasionally, a small measuring tape might be helpful for verifying dimensions. Most KidKraft dollhouses are designed for minimal tool usage, emphasizing ease of assembly, but these additions can enhance the experience and ensure a professional finish.
Inventory of Parts
Before beginning assembly, a thorough inventory of all parts is crucial to avoid frustration later. Your KidKraft dollhouse package should include pre-cut wooden pieces for the walls, roof, floors, and decorative elements. Hardware, such as screws, dowels, and sometimes nails, will be packaged separately, often in labeled bags.
Carefully compare the contents of your box with the parts list provided in the instruction manual. Pay close attention to the quantity and type of each item. Smaller pieces, like windows, doors, and furniture components, are easily overlooked, so check diligently.
If any parts are missing, do not proceed with assembly. Contact KidKraft customer support immediately – details are usually found on the box or in the manual. A complete inventory upfront saves time and ensures a smooth, enjoyable building process.
Workspace Preparation
Adequate workspace preparation is essential for a successful KidKraft dollhouse assembly. Choose a spacious, well-lit area, preferably with a hard, flat surface. Protecting your floor is vital; use a drop cloth, blanket, or cardboard to prevent scratches to both the floor and the dollhouse pieces.
Ensure you have enough room to comfortably lay out all the components and maneuver around the partially assembled structure. Clear the area of any obstructions, including furniture, toys, or other items that could get in the way. Good lighting is crucial for accurately identifying parts and following the instructions.
Consider the assembly time – it can take several hours – and choose a location where you won’t be disturbed. Having everything organized and readily accessible will streamline the process and minimize frustration.
Assembly Steps: General Overview
Generally, KidKraft dollhouse assembly follows a logical sequence, beginning with the foundation and walls. Carefully unpack all components and identify them using the parts list. Start by constructing the base, ensuring it’s stable and level. Then, attach the side walls, followed by the back wall, and finally, the front wall, using the provided hardware.
Next, focus on the roof installation, aligning the roof pieces correctly and securing them firmly. Once the main structure is complete, proceed to assemble the furniture, following the specific instructions for each item. Pay close attention to the orientation of pieces and the type of hardware used.
Throughout the process, refer frequently to the instruction manual or the BILT app for visual guidance. Remember to tighten all screws and connections to ensure the dollhouse’s stability and longevity. Patience and attention to detail are key to a successful build!
Step-by-Step: Foundation and Walls
Begin by laying out the foundation pieces, typically the base of the dollhouse. Align them according to the instruction manual, ensuring a flush and even surface. Secure the base panels using the provided screws or wooden dowels, applying gentle pressure to avoid splitting the wood.
Next, attach the side walls to the foundation. These are usually identified by their height and pre-drilled holes. Align the walls carefully, ensuring they are perpendicular to the base. Use screws to fasten the walls securely, tightening them gradually to maintain alignment.
Proceed with the back and front walls, repeating the alignment and fastening process. Double-check that all corners are square and that the walls are firmly attached to both the foundation and each other. A stable foundation and well-secured walls are crucial for the dollhouse’s overall structural integrity.
Step-by-Step: Roof Installation
Carefully position the roof panels onto the assembled walls, aligning them precisely with the edges. Most KidKraft dollhouses feature angled roofs, so pay close attention to the orientation of each panel. Ensure a snug fit before securing them.
Utilize the provided screws or nails to fasten the roof panels to the walls. Start with the corners, securing them firmly, then work your way along the edges. Avoid over-tightening, which could damage the wood. Some models may include decorative roof trim; attach this after the main roof panels are secure.
Inspect the roofline for any gaps or misalignments. Adjust as needed to create a seamless and aesthetically pleasing finish. A properly installed roof protects the interior of the dollhouse and adds to its overall charm and durability.
Step-by-Step: Furniture Assembly
Begin by identifying all furniture pieces and their corresponding hardware. Refer to the parts list in your instruction manual to ensure you have everything needed. Typically, furniture assembly involves connecting legs to tables, assembling bed frames, and attaching backs to chairs.
Utilize the provided screws, dowels, or other fasteners to join the furniture components. Apply gentle pressure to avoid stripping the screws or damaging the wood. Some pieces may require glue for added stability; allow sufficient drying time before proceeding.
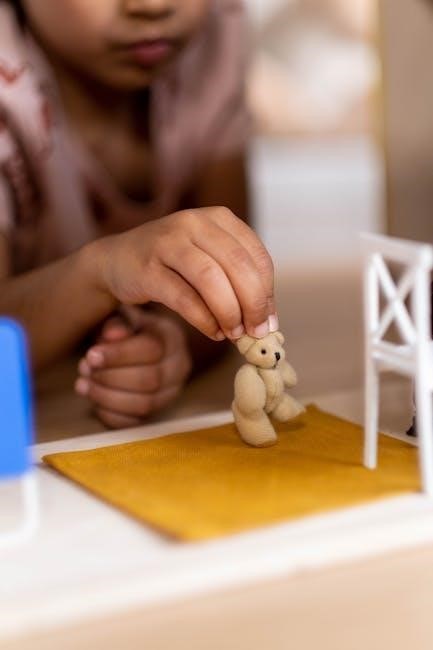
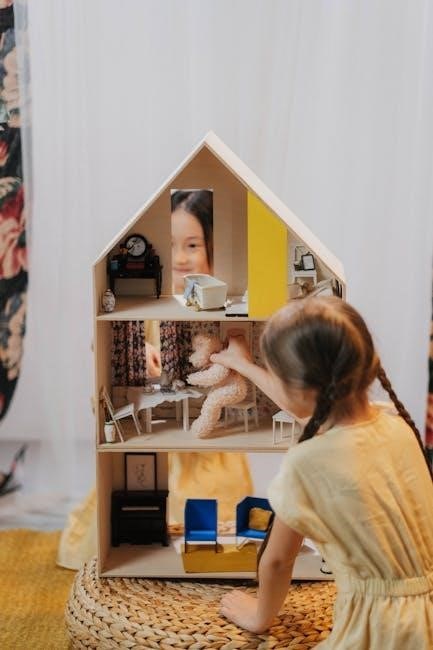
Arrange the assembled furniture within the dollhouse, considering the layout and functionality of each room. Encourage creativity and personalization! Remember to periodically check the furniture for stability and tighten any loose screws to ensure long-lasting enjoyment.

Specific Model Instructions: Majestic Mansion
The KidKraft Majestic Mansion dollhouse, a popular choice, requires careful attention during assembly. Begin with the foundation, ensuring all wall panels are securely connected using the provided screws and wood glue. Pay close attention to the alignment of windows and doors during wall construction.
Roof installation is a crucial step; ensure the roof panels fit snugly and are properly secured to prevent detachment. The Majestic Mansion features intricate details, so take your time with decorative elements like the porch and balcony.
Step-by-step video tutorials are readily available online, offering visual guidance throughout the process. Remember to regularly check and tighten hardware for stability and longevity. Enjoy creating a grand home for your dolls!
Specific Model Instructions: Kaylee Dollhouse
Assembling the KidKraft Kaylee Dollhouse (model 65869) begins with carefully unpacking all components and referencing the included instruction manual. Focus on correctly attaching the side walls to the base, ensuring a flush and stable foundation. The Kaylee model features charming details, so precision is key.
Next, install the interior floors, securing them with the provided hardware. Pay attention to the placement of staircases and any built-in features. The roof assembly requires aligning the panels and ensuring a secure fit to protect against separation during play.
Utilize online resources, like BILT app’s 3D interactive instructions, for a clearer understanding of each step. Regular hardware checks are recommended to maintain the dollhouse’s structural integrity and safety.
Specific Model Instructions: Deluxe Play Around Dollhouse
The KidKraft Deluxe Play Around Dollhouse (Item 65183) is a larger model, typically requiring two people for assembly. Begin by constructing the main frame, ensuring all panels are securely connected. This dollhouse features ample space for imaginative play, so a robust foundation is crucial.
Focus on correctly installing the various room dividers and interior features. The piano, a notable element, requires careful placement and connection to ensure musical functionality. Refer to the step-by-step instructions included with the product, or utilize the BILT app for 3D guidance.
Assembly generally takes approximately one hour or less with minimal tools. Regularly check and tighten hardware to maintain stability and safety, especially given the dollhouse’s size and potential for multiple children playing simultaneously.
Troubleshooting Common Assembly Issues
Encountering difficulties during KidKraft dollhouse assembly is common. Missing parts are addressed by contacting KidKraft customer support, providing the item number and part details. Hardware issues, like stripped screws, can often be resolved by carefully tightening existing screws or requesting replacements.

Misaligned pieces frequently occur; gently loosen surrounding connections, reposition the piece, and retighten. Avoid forcing components, as this can cause damage. Ensure you’re following the instructions sequentially and haven’t skipped a step. Utilizing the BILT app’s 3D interactive instructions can clarify complex alignments.
Regularly inspect the assembled dollhouse for stability. Loose hardware should be tightened promptly. Prioritize safety by ensuring all components are securely fastened before allowing children to play. A stable structure prevents accidents and prolongs the dollhouse’s lifespan.
Missing Parts – What to Do
Discovering missing parts during KidKraft dollhouse assembly can be frustrating, but solutions are readily available. First, carefully re-examine the packaging and surrounding workspace – small parts often hide! If a part is genuinely missing, don’t attempt to substitute with non-KidKraft components, as this may compromise structural integrity.
Contact KidKraft customer support immediately, providing your product’s item number (e.g., 65183 for the Deluxe Play Around Dollhouse) and a detailed description of the missing part. Include photos if possible. They typically offer replacements free of charge, streamlining the process.
Be prepared to provide proof of purchase. KidKraft’s responsive customer service aims to resolve missing part issues quickly, ensuring a smooth assembly experience. Avoid continuing assembly until the replacement arrives to prevent further complications and potential damage.
Hardware Issues and Tightening
Maintaining the structural integrity of your KidKraft dollhouse relies heavily on properly tightened hardware. During and after assembly, regularly inspect all screws, bolts, and connectors. Loose hardware can lead to instability and potential safety hazards, especially with active play.

Use the correct tools – typically a Phillips head screwdriver – to avoid stripping screw heads. Tighten firmly, but avoid over-tightening, which can damage the MDF or solid wood components. If screws feel stripped, try a slightly larger screwdriver or a rubber band placed between the screwdriver and screw head for added grip.
Periodic checks are crucial; KidKraft recommends frequent tightening, particularly after initial assembly and during routine maintenance. Addressing hardware issues promptly ensures long-term stability and a safe, enjoyable play experience for children. Remember to use on level surfaces only!
Dealing with Misaligned Pieces
Encountering misaligned pieces during KidKraft dollhouse assembly is common, but usually resolvable. Avoid forcing components together, as this can cause damage. First, double-check the instruction manual to ensure you’re using the correct parts and following the steps in the proper sequence.
Loosen surrounding screws or connectors to allow for slight adjustments. Gently try to realign the pieces, applying even pressure. If misalignment persists, inspect the connecting edges for any obstructions or debris. Sometimes, a small piece of packaging material can interfere.
If significant misalignment remains, carefully disassemble the affected section and reassemble, paying close attention to the alignment. Patience is key! Avoid excessive force, and remember that a stable structure relies on properly fitted components.
Dollhouse Maintenance and Care
Maintaining your KidKraft dollhouse ensures years of imaginative play. Regular cleaning is essential; use a damp cloth to wipe down surfaces, avoiding harsh chemicals that could damage the finish. For stubborn marks, a mild soap solution can be used, followed by thorough drying.
Periodically check all screws and hardware for tightness. Loose connections can compromise the dollhouse’s stability and safety. Tighten as needed, but avoid over-tightening, which could strip the screw holes. Inspect for any signs of wear and tear, addressing them promptly.
Ensure the dollhouse is placed on a level surface to prevent wobbling or stress on the structure. Avoid exposing it to direct sunlight or excessive moisture, as this can cause fading or warping. Gentle care will preserve its beauty and functionality.
Cleaning Your KidKraft Dollhouse
Regular cleaning is vital for maintaining a hygienic and appealing play space. Begin by removing all furniture and accessories from the dollhouse. Dust all surfaces – walls, floors, and roof – with a soft, dry cloth to remove loose particles. For more thorough cleaning, dampen a cloth with lukewarm water and gently wipe down all surfaces.
Avoid using abrasive cleaners, solvents, or harsh chemicals, as these can damage the wood finish. A mild soap solution can be used for stubborn stains, but ensure it’s thoroughly rinsed and the surface is dried immediately. Pay attention to crevices and corners where dust and debris accumulate.
For fabric elements, such as bedding or curtains, follow the care instructions on the label. Spot clean as needed, or gently hand wash if possible. Allow all components to dry completely before reassembling the dollhouse, ensuring a fresh and inviting play environment.
Ensuring Stability and Safety
Prioritizing safety is paramount when assembling and using a KidKraft dollhouse. Always position the dollhouse on a level surface to prevent tipping. Regularly check all screws and hardware connections, tightening them as needed to maintain structural integrity. Inspect the dollhouse frequently for any signs of damage, such as loose parts or cracks.
Supervise young children during play to prevent them from climbing on or attempting to disassemble the dollhouse. Ensure adequate space around the dollhouse to allow for safe movement and prevent collisions. Avoid placing heavy objects on top of the dollhouse, as this could compromise its stability.
Use and maintenance guidelines recommend regular hardware checks. A stable and well-maintained dollhouse provides a secure and enjoyable play experience for children, minimizing potential hazards and maximizing longevity.
Long-Term Care and Hardware Checks
Maintaining your KidKraft dollhouse extends its life and ensures continued safe play. Implement a routine of regular hardware checks – at least every three to six months – to identify and tighten any loosening screws or bolts. Focus on connection points of walls, roofs, and furniture pieces.
Periodically inspect for signs of wear and tear, such as chipped paint or damaged wood. Address these issues promptly to prevent further deterioration. Gentle cleaning with a damp cloth is recommended; avoid harsh chemicals or abrasive cleaners. Store any unused parts safely for potential future repairs.
Consistent care, including regular hardware tightening and preventative maintenance, will preserve the dollhouse’s structural integrity and aesthetic appeal for years of imaginative play. Following these guidelines guarantees a lasting heirloom.